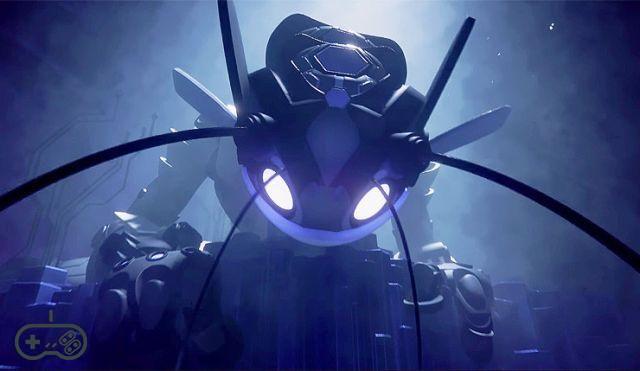
Dishonored 2: guide to open ALL the safes, solution clues combinations [PS4 - Xbox One - PC]
![Dishonored 2: guide to open ALL the safes, solution clues combinations [PS4 - Xbox One - PC]](/images/posts/50cc6522b1d7db72ad981210c891b917-0.jpg)
In this guide we see how to find combinations to open ALL safes in Dishonored 2.
Don't forget to also check out the complete Dishonored 2 cheats and guide tab for other useful guides on this game.
Also in Dishonored 2 the closed safes are back that you have to open using the right code to be able to grab the precious loot present inside them.
IMPORTANT!!! The first thing you need to know if you are interested in opening the safes scattered throughout the various levels of the game is that the combinations are randomly generated and therefore vary from game to game (only the first is an exception). For this reason, if you have found any guide or video that directly proposes the combinations to be entered for each safe, know that those codes will not help you because in all probability the same safe opens with a different password in your game.
For what has just been said, in this guide we will provide you with theand directions to find the clues that hide the combinations of all the safes, so that you can find the ones related to your game, which are indeed unique.
What the safes contain in Dishonored 2
Finding safe codes won't be overly challenging, but you may be wondering if it's worth the effort to open them. The rewards kept inside the safes are of different types: runes, bone fragments, money or even documents that in some way can affect the course of the story (the game has several endings). In any case, it will always be quite valuable loot, so I strongly recommend not to forget about opening the safes.
How to find safe combinations
Below we list, one by one, ALL the safes featured in Dishonored 2 along with directions to find the combinations within the game.
Safes Mission 1: A long day in Dunwall
Safe # 1
Where is the Safe: out of the building, when you are in the streets of Dunwall proceed until you see a house with the word "Rent" on the right. Inside you will find a room with a safe. Watch this video for more help.
How to find the combination: The combination is hidden behind the painting which is in the same room. For this safe ONLY the combination appears to be the same for all games, so you should also find the combination "451" written on the wall.
Safes Mission 2: At the Edge of the World
Safe # 2
Where is the Safe: after passing the barrier of the electric wall, you will notice a drainage channel in the center of the square. With the electric wall behind you, the entrance to the Karnaca Enclave is in the red building to the right of the drain. Inside the Karnaca Enclave you will find the Vice Priest's office where this safe is located.
Please note: I personally arrived at the Enclave of Karnaca following the secondary mission of the Outpost of the Priests, which was entrusted to me by Mindy. This woman is in one of the buildings in the area, sitting on a sofa (when you approach she will say she has something to tell you). I do NOT think it is necessary to start this mission to be able to enter the enclave.
How to find the combination: to get the combination of this safe you will need to find two documents: "The seven constraints" and "Salvation in constraints". The first lists the seven constraints and is in the same room as the safe, the second says which are the three most important constraints and is in the room with the projector (also in the Karnaca Enclave building). When you have both these documents, just consult the menu with the mission clues where you will find the combination already written (in essence, assuming that the most important constraints in your game are the first, third and fifth, then the combination will be 135) .
Safe # 3
Where is the Safe: The safe is located at the back of the "Winslow" safe shop. This shop is located right across from the guard-guarded entrance to Addermire Station.
How to find the combination: to get the combination of this safe, simply open the cash register on the counter at the entrance to the store.
Safes Mission 3: The Good Doctor
Safe # 4
Where is the Safe: The safe is located right at the entrance to Addermire's main lobby where, in the central corridor, you will see an electrified wall. If you look at the power wire of the wall you notice that it rises above the balcony at the top right (you can get there easily using the translation skill). There you will find two safes, in addition to the panel to turn off the electrified wall.
How to find the combination: one of the two safes is already open, while the other opens with the combination written in a note that is on the desk located at the entrance to the room where these safes are located.
Safe # 5
Where is the Safe: To find this other safe proceed normally with the main mission where you will end up looking for and finding Hypatia in the convalescence room. BEFORE talking to her, check the area where Hypatia is to find the character Vasco on a cot.
Please note: I personally arrived at Vasco following the optional mission present in this level, that is to find the clues about the slayer of the crown. I suppose: by completing this optional mission you will find Vasco alive who will talk to you giving you the clues of the safe as happened to me, otherwise you would have to find Vasco dead on the couch and the clues will be on a letter that you will find by searching his body. Vasco will tell you where the safe is and also the combination to open it. IMPORTANT: finding this safe is important to the game's storyline, but it doesn't seem to be mandatory. I can say, therefore, that the reward contained in this safe is one of the options that lead to the good ending of the game.
How to find the combination: as already mentioned, Vasco (dead or alive) will give you the location and combination of this safe.
Safe Mission 4: The Clockwork mansion
Safe # 6 (Lower Aventa district)
Where is the safe: when you have exited the sewers, go left, up the stairs. Enter the alley on the left of the "Station" sign, continue until you see a house with the word "for rent", enter the house by crouching down. Go up the stairs of the house to find the safe in one of the rooms.
How to find the combination: in the next room you will find a blackboard with three numbers, but the last one is crossed out. The legible ones are the first two numbers of the safe combination, the third one you will find by scrolling through all the numbers of the third slot, until the safe opens. Check out this video showing where the safe and the board with numbers are located.
Safe Mission 5
Safe # 7 (Cyria Gardens Conservatory)
Where is the Safe: Once you reach the Royal Conservatory you will find an electric wall blocking the road. Put the gate behind you and look up to find a balcony. Go up and enter to find this safe in one of the rooms.
How to find the combination: the only way to get the combination of this safe is to buy the document with the relevant code from the black market dealer in this area (or steal it from the same seller ...).
Safe Mission 6: The Powder District
There are no safes on this mission
Safe Mission 7
Safe # 8
Location of the Safe: Enter the estate and use the heart to locate the corrupted bone fragment, it is located near the elevator. The door will be closed in both periods, you proceed in the present. Go under the table near the wall, go to the past and enter the room.
How to find the combination: Here you put the dog's body in the furnace and light it while waiting for it to burn out. Go back to the present where you will find the road clear and you will see the safe with the exact combination. Keep the numbers in mind, go back to the past and open it.
Safes Mission 8: The Grand Palace
Safe # 9
Where is the Safe: Before entering the building, go to the third floor of the adjacent apartment. The safe is hidden in the bedroom, where you will find a bone bracelet placed under a pillow.
How to find the combination: head to the desk where you will notice a picture of a man, the numbers will be easily identifiable.
Safe # 10
Where is the Safe: upon entering the building, this safe is located in the First Captain's suite.
How to find the combination: go to the Duke's suite, on the third floor. Explore the room to find the code easily.
Safe Mission 9: Death to the Empress
Safe # 11
Where is the Safe: it is in exactly the same position as Safe # 1 (see start of guide).
How to find the combination: The combination is also the same, 451.

![Dishonored 2: guide to open ALL the safes, solution clues combinations [PS4 - Xbox One - PC]](/images/logo.png)


![Silent Hill Downpour - Guide to Finding All Mysteries in Murphy's Journal [360-PS3]](/images/posts/dd710c95246c60edeb7c070914f9a1cf-0.jpg)

![Sherlock Holmes the Devil's Daughter Case Solution Chain Reaction [PS4 - Xbox One]](/images/posts/6b006b4c7ef3da140b461b6a1453079d-0.jpg)



![Battlefield 1: how to unlock and change vehicle and aircraft skins [PS4 - Xbox One - PC]](/images/posts/7ed1336f5445e3a49432aa0c9ef23b63-0.jpg)
![The Bureau Xcom Declassified: Video Complete Solution [360-PS3-PC]](/images/posts/3d587ed11333de33259aef7944ede4e9-0.jpg)
![Naruto Shippuden Ultimate Ninja Storm Generations - All Playing Card Passwords [360-PS3]](/images/posts/34b3562fa61c8a5aa9aa9d711dbd9b4f-0.jpg)



![Dragon Ball Xenoverse 2: guide to unlock all characters [PS4 - Xbox One - PC]](/images/posts/d151f435e211f67094b9a1fa2a5af061-0.jpg)
![Skyrim - How to become a vampire [guide to vampirism]](/images/posts/a4bb58be06bee6da1634eb858ec0ff7f-0.jpg)

