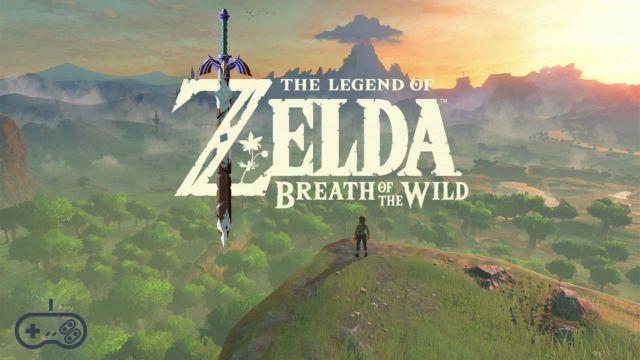
The shrines inside The Legend of Zelda: Breath of the Wild they are points of reference that, as you continue in the adventure, you will meet along your way. Many of them are labyrinths or, in any case, very complex structures. This guide will reveal how to solve all the Shrines of the Torre di Fiore.
SACRARY OF YAO MAAYO
In the extreme southeast of the Firone region you will see the shrine overlooking the Vappesca village. Climb to the lowest level of the scale and control the cube with kalamitron. Put it on the other plate to get to the platform above. At the bottom of the stairs there is a small guardian that you can stun with the electric arrow, then, if you have an ancestral weapon, take him out. With kalamitron take the chest that is beyond the fence and drop it on the switch that is on the ground nearby to open the door. You can open the chest either before or after the action. When you are in the next room, lower the two plates on the left with the chest that you previously placed on the switch. Place Link on the farthest plate near the wall. Then move the chest to the other plate near the wall. Now, with the plate raised, you can open the second chest. Grab the contents and jump to the plate you just lowered. Then move the original chest to the plate you raised a moment before, precisely the one close to the wall. This will cause Link to climb high enough to reach the last platform, then make your way to the altar.
KYUTA NATA SHRINE - shrine challenge: the test of lightning
It is located east of the Firone Tower, on the south shore of Coral Lake, and will be visible at the end of the Shrine Challenge. In the forest east of Coral Lake is Kashiwa, the wandering singer, who will provide you with clues. To reveal the secret, you have to make Link wear metal equipment, place it on a mound between the palm trees and attract a bolt of lightning. You will take some damage and will have to recover lost equipment, but it is the most effective method. Alternatively you can place the object on the mound but it must be placed on the exact center of the top otherwise it won't work. Entered the shrine, open the casket and reach the altar.
SHODA SAH SACRARY
It is hidden behind the south waterfall of the Rilogogo lake, accessible by a path to the right of the waterfall. You will need to fit a metal sphere into each of the two concave platforms, and there are two ways to do this. Drop a sphere on one of the two thrusters and activate it by hitting, for example with a radio-controlled bomb, the nearby crystal. It is preferable to start with the sphere to your right of the starting position and the difficulty is to move it at the right moment to make it fall on the moving platform. In other words, activate the command about a couple of seconds before the mobile platform reaches the middle of the path. Use the same system for the second platform, synchronizing the activation of the crystal so that the sphere can pass under the movable panel on the right, ie you must leave the sphere next to the edge of the thruster near the crystal. the second system is less articulated. Drop the spheres into the water, doing it on the ramp leading to the water, to avoid getting in the way of the moving platforms. You can materialize a block below them with the glacyor, then step onto the block and throw the orbs onto the platforms. After placing them, open the chests thrown from the upper platforms and land near the thrusters. In one of them there is a key that will be used to open the door that will take you to the altar.
SACRARY OF MA KAYA - challenge of the shrines: fragments of monument
It is hidden in the ruins of Palmida and will be visible after completing the challenge, and to start it you need to talk to Nagari. You need to find three fragments of a monument and show them a picture of each piece. Since they glow in the dark, finding them will be quite simple. After finding them you have to go up to one of the nearby pedestals and crouch, Nagari will also do so by making the shrine appear. Let's see where the fragments are. One is located a little further east of Nagari, along the cliff leading to the beach. Another is southwest of Nagari, submerged in the water where it is shallow, next to some barrels and wooden crates. Finally, the third is located on the extreme tip of Cape Isaki, the curved peninsula south of Palmida beach. When you are in the shrine, go up the left ramp and grab a wooden barrel. Get on the mobile platform when it arrives. After passing the first side grill, place the barrel on the right side of the platform, bend down and go under the next grill. Stay to the right to avoid the last side grill, then grab the barrel and place it on the ground switch at the end of the passage. You can now access the chest that contains a key that you will need to open the door in the center of the shrine and activate the altar. Before you do that, grab the other chest, then go up the ramp on the other side of the room and grab the barrel again. Climb on the moving platform as soon as it arrives, lean on the barrel, take the bow and aim for the crystal. Hit it just before you reach the closed door, then immediately turn right and hit the crystal again once you pass that same door. Be careful because if you hit the crystal too early or too late, a gate will block the path and you will have to start over. Beyond the passage, place the barrel on the switch on the ground to raise the door leading to the second chest.
TAWA JINU SHRINE - shrine challenge: the three giant brothers
The shrine is south of the Finterra tower, interact with the old stele found on Mount Terume, just west of the Terume pass. You have to place the three spheres that are on enhanced versions of the hinox in the corresponding pedestals. They each have their own card in the album, so take a picture of them. If you have trouble defeating them, climb to the top of one of the giant bones in the area, and then shoot your arrows in the direction of their eyes. The old menbro hinox is in the Labella swamp, the young one is in the Esnabol pond and the middle one is in the Cetodon pond. Once you have the three spheres, place them on the pedestals and the shrine will show itself. As you make your way to the altar, pick up the chest.
KUGU CHIDE SACRARY
In the southeast corner of the world map is the shrine on the island of Terrafinita and you can get there in two ways. If you have a well-developed stamina gauge you can glide from the tip of the Squama headland, or take a boat to the island with a Korogu fan. This is a complicated challenge as you will be deprived of all equipment and resources, so to solve the test you have to collect the materials on the spot. It involves placing three spheres in the concave spaces located more or less at the three vertices of the island which has the shape of a triangle. The materials to be recovered of great interest are: the bananas to restore the hearts, the bows of the defeated archers, the arrows of the archers and the wooden boxes, the soldier's sword that is in the chest inside the muddy pond and that you can recover with the kalamitron, and finally another sword that is in another chest near the southeast pedestal. Keep the most effective weapons for when you encounter the hinox, while at other weaker opponents you can throw the bombs that are free. To reach the north pedestal, throw a sphere into the water and create an ice block with glacyor under it, climb onto the block and pull the sphere into the hollow. The pedestal to the south east is covered with a large stone slab and can be lifted with the octopalloon. In the forest in the center of the island you can defeat an octorok and get one. After moving the plate you can position the sphere. The pedestal to the southwest is controlled by enemies and partly covered by a metal cube that you will move with the kalamitron. The third sphere is attached to the hinox's neck, so start stun it by throwing an arrow at it in the open eye, then attack it with sword combos. If you have used the best weapons against other opponents things get a little complicated, so help yourself by detonating the bombs in the eye. Taking the sphere, take it to the pedestal to reveal the shrine. It is also possible to cut the pendant with an arrow, collect the emblem and run towards the pedestal avoiding fighting the hinox.
SAI UUTO SACRARY
It is in a cave south of the lake stabling, hidden by the rocks, destroy them with the radio controlled bombs and enter. On the swing platform, use stasys and reach the upper floor, then do the same with the next platform. At the top you will find the first chest. Go back to the second swing platform to lift the opposite side and block it with stasys so you can reach the third swing. Lower the far end, turn around and block it with stasys, run up the ramp and jump to the last horizontal swing platform. Do it as fast as possible otherwise you will have to repeat the maneuver. The second chest is at the top and it seems difficult to reach it. Instead, position yourself at the far end of the swing platform that is closest to the chest, better if you are already heading towards the chest, use the kalamitron to drop the first chest and catapult Link up. When you are on the highest point, use the paraglider to reach the second chest.
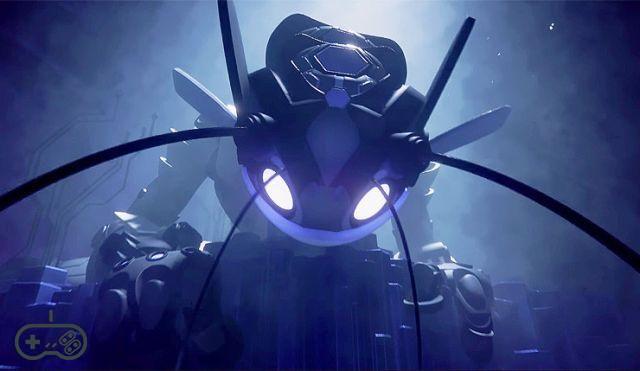
MUO JIIMU SACRARY
It is located at the top of the Squama headland, in the southeast corner of the world map. Here you will have to fight against a 3.0 nanoguardian.
![Silent Hill Downpour - Guide to Finding All Mysteries in Murphy's Journal [360-PS3]](/images/posts/dd710c95246c60edeb7c070914f9a1cf-0.jpg)
![Sherlock Holmes the Devil's Daughter Case Solution Chain Reaction [PS4 - Xbox One]](/images/posts/6b006b4c7ef3da140b461b6a1453079d-0.jpg)


![Battlefield 1: how to unlock and change vehicle and aircraft skins [PS4 - Xbox One - PC]](/images/posts/7ed1336f5445e3a49432aa0c9ef23b63-0.jpg)
![The Bureau Xcom Declassified: Video Complete Solution [360-PS3-PC]](/images/posts/3d587ed11333de33259aef7944ede4e9-0.jpg)
![Naruto Shippuden Ultimate Ninja Storm Generations - All Playing Card Passwords [360-PS3]](/images/posts/34b3562fa61c8a5aa9aa9d711dbd9b4f-0.jpg)


![Dragon Ball Xenoverse 2: guide to unlock all characters [PS4 - Xbox One - PC]](/images/posts/d151f435e211f67094b9a1fa2a5af061-0.jpg)
![Skyrim - How to become a vampire [guide to vampirism]](/images/posts/a4bb58be06bee6da1634eb858ec0ff7f-0.jpg)