


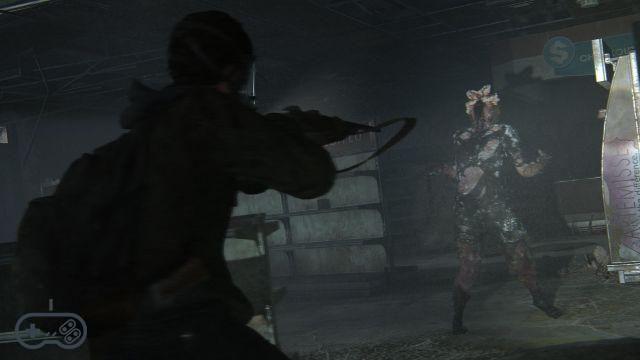
The Last of Us Part 2 recently made its PlayStation 4 debut, offering a world full of interesting secrets hidden in every nook and cranny, which you can retrieve for in-game perks and learn more about the lore of the experience N. This is exactly what the manufactured goods, optional documents which however offer some specific stories and details about the setting in which they are hidden. So here's our guide on where to find all The Last of Us Part 2 artifacts, divided into each of the chapters.
Before leaving you to our guide, we remind you that the following text may contain major and minor spoilers on The Last of Us Part 2. These in several cases concern details of the game script, but also more or less advanced playful insights. With either category, you may run into enough detail to undermine your pad experience. In the event that you have not concluded the experience and do not want to incur any kind of advances, we advise you not to continue with the reading of the following text.
The aforementioned artifacts, or whatever documents you prefer to call them, are really many and can be found both with Ellie that with Abby. So here are all their locations listed in The Last of Us Part 2!
- Guide to find all the coins
- Guide to find the Carved Ring
- Guide to finding the Relic of the Sages
- Complete guide to crafting
- Guide to weapons and their modifications
- Help to find workbenches
- Guide for all diary entries
- Code guide for each safe
- Guide for the Platinum Trophy
- Guide to all the infected and how to defeat them
- Guide to skill upgrades and manuals
- Seattle Gate Codes Guide
- Guide to find all collectible cards
Jackson
Awakening
# 1 - Voluntary Receipt
On one side of the map you will find a pile of lumber, the first artifact of The Last of Us Part 2 is to its right, next to a ladder.
Panoramic point
# 2 - Artifact
After shooting the zombie between the beams, immediately turn left, without continuing straight. The artifact is in the room, on a table.
Patrol
# 3 - Letter to Santa Claus
During the horseback ride you will find a destroyed house on your left, stop nearby and climb up to the second floor, you will find it in a drawer near the bed.
# 4 - Apologies at the supermarket
After passing under the heavy vehicle an infected will attack Ellie. Once knocked out you will have to continue straight to a door, then make your way into the truck and retrieve the item.
# 5 - Employee of the month combination
Once you have put on the masks, and entered the fungal danger zone, pass the bottleneck and head into the room on the right, the document is in the corner of the room, on a table.
# 6 - Eugene's Pendant of Lights
In the library go to the closed room by breaking the glass, the artifact will be recovered by Ellie after opening the door.
# 7 - Ultimatum in Eugene
In the same place you will find another artefact linked to Eugene, located in a bedside table right next to the bed on the floor.
# 8 - Photo by Eugene and Tommy
On the opposite side of the bed, right on a table in plain sight, you will find the last artifact of the place.
Preparations for departure
# 9 - Joel's watch
It is located in a red box upstairs, you will have to open it necessarily to continue in the plot.
Seattle - Day 1
The gate
# 1 - Presidio gate codes
After passing the gate you will find them in one of the small structures, simply by breaking the glass and continuing, they are located in a drawer.
# 2 - Map of Seattle
Stopping in a building on the left, during the ride, you will find the very useful map of the area
# 3 - Notes from the Refuge
Just in front of the gate, turn the building to the left going up the stairs inside, you will find the artifact in the center of the table.
# 4 - Infographic of the infection
You will find another artifact in a similar building, simply continuing down the same street and passing a small open gate, again in the center of the table.
# 5 - Isaac's Orders
Climb on the destroyed wall and let yourself fall on the scaffolding, you will find the artifact at the end of it after climbing a ladder.
# 6 - Notes on the roof
As the name suggests, they are located on the roof of the structure. You can get there by climbing on the generator cable, and obviously throwing it at the right angle to be able to use it.
City Center
# 7 - FEDRA census sheet
As soon as you arrive in the area, go to the small gazebo nearby, you will find the document in a drawer.
# 8 - Plans for a bank robbery
Once in the open area, go under the first building on the left, the bank. Go past the chasm in the wall and continue straight, you will find the document in the last room, on the ground.
# 9 - Letters from a bank robbery
As soon as you open the vault you will find it on the ground, find all the codes for the combinations in the following guide.
# 10 - Ancient Ring
A little further on from where you found the shotgun, Nathan Drake's ring is inside a safety deposit box.
#11 - Stock seeker message
In the building located above the bank, right on the map you previously found, there is an artifact. Enter the ruins of the place, it is right in the center of it.
#12 - Isaac's letter
Going to the left, ahead of a tank now devoured by nature, you will find the object on the ground.
#13 - Message on the common escort of the WLF
To locate the building use the map, it is the fourth vertically and the third horizontally. Just go up the stairs to find the message.
#14 - Drawing of a road
Go around the same structure, and climb the scaffolding with the ladder, it's in the drawer.
#15 - WLF Shelter Stocks Message
Orienting yourself with the map you will find the building as a third horizontal and sixth (last) vertical. Break a window and grab the document from the counter.
#16 - Pet shop key
Continue to the other room, then go to the bathrooms on the right, the key is on a shelf in front of the door.
#17 - Message: Enlist in the WLF
After taking the key you can proceed with this object, go to the fourth building vertically and third horizontally, proceeding through a door on the side. Open it and continue, then open the first door on the left, it is right there in front, on a shelf.
#18 - Message from the mole
Go to the fourth square horizontally, and fourth vertically, where there is a long road. Open the van in the middle of the small lake, and enter it after the short cutscene to find the note.
#19 - Emergency protocol note
In the map you will find the second building horizontally, and third vertically, after crossing the narrow space go right and go up the ladder, the note is in the small gazebo.
#20 - Letter from Rabbi Saunders
Continue in the structure towards the left side, you will find it after having launched the rope, in a desk shortly after the door in view.
#21 - Letter to a friend
Go to the third building horizontally and fifth vertically, continue towards the long corridor where there are many corpses. Where the wall says FEDRA, bend over to pick up the object, placed in the skeleton of one of the bodies.
#22 - Final memorandum of LT. Torres
Continue to the left, break a window and enter the hall, take the knife from the corpse leaning on the wall to unlock the note.
#23 - List of WLF agitators
A little to the left, open the cabinet and take the artifact.
#24 - WLF Recruiting Journal
Going in search of the enemies, in the building where the infected enter, go up to the second floor and look in a piece of furniture, in the room on the right just after the stairs.
Eastbrook Elementary School
# 25 - Leah's note
The video will give it to you, impossible to miss.
# 26 - Photograph of Leah
You will also get this through the video mentioned above.
#27 - Isaac's orders
Continuing with the path you will find yourself with Dina in a structure very similar to a closet, on the desk you will find the artifact. Look for the bedroom and in the nightstand next to the bed you will find the paper.
Capitol Hill
#28 - Chevy's apology
Adjacent to the pool area is a small corridor dividing two buildings, go in that direction to find an access to the building. Follow the trail of blood and continue up the stairs, watch out for the runner who could hit you from behind once you finish the ramp and enter the same room he came out of. Above the bed you will find the artifact.
#29 - Raul's Peace Offering
Continue past the motel and, just before turning left, pay attention to a fairly interesting balcony. Fixing the latter, turn right to take the dumpster, move it and place it under the balcony. Climb on it and enter the apartment, in the drawer next to the fridge the note is hidden.
# 30 - Rebecca blown
In the library in front of the gas station, the one infested with the infected, you will get the artifact. Enter and go to the back room, turn left and on the desk you will find the tip.
# 31 - Scribble on the tower
By the time you can find this artifact you will have just known the traps. After seeing the clicker explode above one of them, continue being very careful not to go the same way as it. Continue along the path and, as soon as you pass the second entrance, immediately turn right to see some stairs. Grab them to find yourself at the top of the tower and find the note with other interesting materials.
#32 - Raul's account
Drop off the aforementioned tower and slide down to the area below. Continue along the natural path, passing to the left of the bridge but pay attention that after a while you will see an abandoned truck. Luckily its back will be open, enter it to find the artifact.
# 33 - Fran's refusal
At some point in the story you will find the first corpses left by Tommy. Continue to the left but keep to the right, so you will notice a building with broken windows. Enter it to realize that you have ended up in a well-equipped gym, head to the communications bulletin board to find the leaflet.
#34 - Preminder of the flea market
Exit the previous gym and head to the building opposite, watch out for the traps ready to explode you so as to enter the thrift shop. Go into the back room and just past the door on the right is the information board with the artifact hanging on it.
Channel 13
# 35 - Encouragement from Dad
After finding one of the culprits killed by the hyena arrows in the TV station, exit the room and go to the second room on the right with the broken windows. As soon as you enter above the sofa on the right you will find the note sheet.
The Tunnels
# 36 - Message in the subway
After escaping from the clickers and soldiers and closing the door of the subway car, go all the way and hang by the window you will find the note.
#37 - Carved statue
After opening a portcullis with Dina who will have helped you to go through a cart, continue down the corridor until you find a door on the right. Enter it, and go immediately left. As soon as you enter, go back to the left and above a small bedside table you will find the figurine.
# 38 - Message on the can
Still in the same room, go to the snack machine and break the glass, take the can to find the message.
# 39 - Note door locked
Above the table to the right of the machine mentioned above.
#40 - Metro station message
Just before exiting you will have to cross a last wagon, before going down on the right hangs the artifact.
Theater
# 41 - Cassandra's schedule
Go to the counter area, the artifact is above the crate on the left.
# 42 - Diary of a FEDRA soldier # 1
Go upstairs and as soon as you arrive go to the terrace on the left, as soon as you cross the threshold go to the table on the left to find the artifact.
#43 - Diary of a FEDRA soldier # 2
Also upstairs open the closed white door, follow the corridor and go to the door on the left to find an office. Above the radio is the artifact.
#44 - Sick Habit concert flyer
On stage just before the curtains.
Birthday gift
# 45 - Suicide message
Continue with the natural path until you find a corpse with the message on the ground.
Seattle - Day 2
Hillcrest
#1 - Message: Enlist in the WLF
Once in the area with all the shops, keep left and enter the third which will correspond to the laundry. Go to the back room and above the desk you will find the paper.
#2 - Drawing of Rosedale's daughter
Exit the laundry room and go to the building opposite. Through a hole behind the counter you can access the floor below, on the desk you will find the note.
#3 - Message from Yolanda
After the shopping area, go immediately left to enter another commercial activity. Go to the counter to find the note.
# 4 - Note a plan
Exit the shop just mentioned and go immediately right, continue among the brambles until you find yourself in a space with an overturned dumpster. Use it to get to street level and pop up in front of a shop. Break the window and enter, on the counter you will find the note.
#5 - Condolence message
Continuing in the story you will have to solve an environmental puzzle in which the dumpster will tend to go down due to the slope of the road. Once you have solved the puzzle you will find yourself in a room with a workbench. As soon as you enter go to the room on the right, resting on the desk you will find the note.
#6 - Hillcrest Tattoo Shop Message
Enter the valvet tatoo, in the back room on the desk you will find the artifact.
#7 - Message about the delivery of Boris
Go into a liquor store but watch out for the infected. Your goal will be to enter the back room which is blocked by windows that you can easily break. Clear the area and take the document inside the building.
#8 - Combination of Dale
From the previous point, take the hole in the wall to find yourself inside a pub, go to the kitchen to find the note hanging on the wall on the left as you enter.
# 9 - Boris confession
Your goal at this point will be smoke, so following the story and passing a fence you will inevitably arrive in the garden of a house. Enter the building, in the living room on the table you will find the notes.
#10 - Rosemont flyer
It is located in the same house described above, on top of a piece of furniture near the kitchen.
In Search of Ropes
# 11 - Invitation from Tara
At some point you will be asked to put on the mask, follow Joel but up to a certain point. You will notice that a room will be skipped, number 107 as you are in a hotel. Enter it and take the artifact on the desk.
Looking for Nora
# 12 - List of WLF Targets
Follow the path and exit the shop in which you must have entered. Continuing on the road you will see a red room. Pay attention that inside you will find clickers. On the ground, near one of the windows, you will find the notes.
#13 - Last letter to her husband
Enter the building very similar to a hotel, the one with a hyena symbol on the wall. Go upstairs via the elevator area, solve the environmental puzzle of the glass window and enter the locked door. The artifact, like other important assets, is within it.
#14 - Evacuation letter
Follow the path and go through a small indoor area, past it go left and climb to the roof of a destroyed truck. From there it will be possible to access the building, explore the rooms on the right to find the notes.
#15 - List of WLF deserters
In the room where you found the explosives manual, next to the TV.
# 16 - Pleading of the dying husband
After exiting the forest and opening the door to the next scenario, you will find yourself inside a building. Go up the stairs and cross the room to exit. You will arrive at the emergency stairs, go up the floor and you will notice in a new room a corpse that will have left a note. To access his room you will have to break a window.
# 17 - Pharmacy note
Once on the roof, take the ladders to dive into the water, exit immediately in front of you and head towards the broken wall on the left. Follow the stairs and go up as far as you can, keeping to the left, until you reach the entrance to the pharmacy. Go over the counter and under the cashier you will find the note.
#18 - Hospital inventory list
At this point you will have recognized the part dedicated to the last gameplay trailer before the game is released. After the door that marks the end of the fight zone, take the stairs and reach the floor above. Open the door and enter the room in front of you, inside it above the desk you will find the list.
# 19 Bonus document
When Ellie flashbacks the operating corridor of the Lights, don't enter the room right away. First you will notice several boxes, obviously with the note above.
Seattle - Day 3
Towards Aquarius
# 1 - Message in the garage
Enter the garage near the lake of mud, continue straight and climb over the wall on the left, go up the step to the right, go up the slope, the message is in the center of it.
# 2 - Note from the book store
When Jesse makes you climb into a building, continue straight and fall into the chasm, the artifact is near the bookcase on the corner, on a table.
# 3 - Textile note
Go up to where the sniper shoots you, on the scaffolding, but instead of going up, enter the room on the right, turn left and go through the door, go up the stairs and take the document on the wall between the two windows.
The Submerged City
# 4 - "Escort" ticket
Where Ellie's boat stops up the stairs, the note is next to a corpse leaning against the wall in one side of the first room.
# 5 - Note on the Shambler
After taking the boat and getting off the quick entrances into the Carthy shop, which is half flooded, the note is next to a lantern, right next to a corpse in plain sight.
#6 - Message from the sniper
Where you will meet the Seraphites, turn left, until you reach a red and white bus suspended in the air among the rubble. Climb to the roof, jump into the other dome and inspect the sniper's body.
# 7 - Camp Note
Right in the middle of the Seraphites that you can go around silently, on a gray-painted wall, next to a piece of furniture.
# 8 - Arcade aviator
After breaking through the glass of the arcade with the boat, inspect the tables, the flyer is on the first starting from the left.
#9 - Playroom flyer
After breaking through the glass of the arcade with the boat, go up the stairs, move the cart and face the enemies after breaking the floor. Open the shutter at the Prize Zone sign, go upstairs, pass a brick archway and take the document on the left.
The park
Hunting Lesson
# 1 - Abby's drawing of Owen
Open the inventory, you will find it already there, otherwise you will miss the collectible.
# 2 - Thank you letter from Mel
Open the inventory, you will find it already there, otherwise you will miss the collectible.
# 3 - Zoo Vacation Brochure
Go under the fallen tree looking for Abby's father, you will find her on a bench under a small wooden gazebo.
Seattle - Day 1
On foot
# 1 - Note from the rifle in the WLF hideout
After reaching Manny, break a glass of the broken train, climb over and take the note near the door.
The Outpost
# 2 - Letter from the WLF interrogator
Go through the door where the guard is smoking, follow Manny and get the letter on a table before the door on the right.
Hostile Territory
# 3 - Scar Suicide Note
Go around the Dumpling shop, continue straight and turn left, climbing over a broken window, the note is on a dead body on the ground.
# 4 - Supplication to the Oracle of the Seraphites
Enter the third shop in the alley, to the right of a wall with a large dragon drawn, go up the stairs and go under the table, jump to the other building and go up to the roof.
# 5 - Jasmine Bakery Safe
Go down below and explore the room to the left of where you jumped, the note is on closed boxes.
# 6 - Relic of the Sages
This item guarantees a The Last of Us Part 2 trophy, you can follow the following guide to find it, it is located in the room adjacent to the previous note.
#7 - Seraphite Prayer to the Oracle - Peace
Enter the truck with the purple door, the note is on the right, you will find almost all the other notes of this chapter of The Last of Us Part 2 nearby.
# 8 - Seraphite Prayer to the Oracle - Steed
All the prayers are hung in the nails around the middle.
# 9 - Seraphite Prayer to the Oracle - Respect
All the prayers are hung in the nails around the middle.
#10 - Seraphite prayer to the Oracle - Union
All the prayers are hung in the nails around the middle.
#11 - Seraphite prayer to the Oracle - Victory
All the prayers are hung in the nails around the middle.
#12 - Seraphite Prayer to the Oracle - Prosperity
All the prayers are hung in the nails around the middle.
#13 - A WLF soldier encounters the letter for prophet
Climb the wall on the left, the letter is on the table
#14 - Letter from a Seraphite father to his son
After crawling past the cabinet, turn left and enter the door with the red sign, the note is on the table.
The forest
# 15 - Broken truce
On the office table, after the red door.
The coast
# 16 - Infirmary ticket
As soon as you enter the boat, in the first room on the right on one of the loungers.
# 17 - Mutiny Message
After finding the crossbow, continue straight under the WTA sign.
# 18 - Ferry Log
On the corpse just after the forced door.
Seattle - Day 2
The Shortcut
# 1 - Amputation Medication List
As soon as this chapter of The Last of Us Part 2 begins, open your inventory to find the note.
# 2 - Request for survivors
As soon as you pass a section where you have to jump onto platforms in the middle of the water, you will arrive inside a building. Climb the stairs and go upstairs, following the natural path you will arrive in a room with the door closed. Below the ground in front of the door is the note.
# 3 - Exchange between neighbors
Still following the story, at a certain point you will have to jump onto a terrace. Once this is done, break the window and enter the building. On the desk just before the door you will find the note.
# 4 - Laundry list
Also in this case the story will take you inside a laundry, the corpse at the foot of the counter holds the artifact.
# 5 - Truce of the Seraphites
Arriving between the buildings, there will be a certain point where your companion will cross a point of the building by means of beams. Of course you won't be able to go through it, but you will easily pass that point thanks to a room on the left. On one of the desks is the note.
# 6 - Orders of the Seraphites
Once you have finished the elevator sequence, go ahead but, before entering the next room, take the note hanging on the wall to the right of the entrance.
The downhill
# 7 - Gym code
Exit the gym and turn right, continue to find yourself in the canteen. Go past the counter and go to the back, in the clipboard you will find the note.
# 8 - FEDRA orders
Impossible to miss, the story of The Last of Us Part 2 will automatically give it to you
# 9 - FEDRA Final Note
When you lower the rope into the infected part, you will find yourself in a room with a huge hole in the wall. Go through it to find a FEDRA corpse with the note nearby.
Epicenter
# 10 - Letter of Annex
Nora will have just abandoned you, go immediately to the door on the left. Open it and go right and then continue straight ahead. Before continuing to the ward, however, you must notice a room on the right blocked by beams. Crawl underneath to pass, next to the corpse you will find the letter.
# 11 - Letter from a soldier
Continue with the path until you go down and find yourself on a floor surrounded by the corpses of the soldiers, one of them at the foot will have the artifact.
# 12 - Note from the chapel
From the previous artifact, instead of continuing, turn around to see a room with no way out. This is none other than the hospital chapel, on the altar you will find the note.
# 13 - Patient Note
Once you have forced through the yellow door of the contaminated area, continue until you exit the corridor and find yourself in a slightly larger area. Go through the entrance reserved for ambulances and break the window in the next room. Enter and on the bed next to a cavare you can take the sheet.
# 14 - Doctor's Note
Continue to the only accessible path, in the area where the infected are still blocked due to a power failure. On the desk of the only accessible room you will find the note.
Seattle - Day 3
The Port
# 1 - Navy Note
When you arrive at the port you will have to see a cutscene in which you will help your partner to climb over. Once this is done, go to the ticket office, climb over and at the corner of the counter you will find the note. Furthermore, you can now unlock the previously closed door.
Isola
# 2 - WLF diary note
On a corpse along the way, impossible to miss.
# 3 - Venison distribution
Enter the first house you will find to find the note on the counter.
# 4 - Prayer
Before leaving the first part of the village, go to the small sanctuary on the right, there will be a note hanging on the wall.
# 5 - Diary of a young Seraphim
In front of the shrine just mentioned there is a house, above one of the beds you will find the diary page.
Santa Barbara
2425 Costance
# 1 - Nameless
As soon as you arrive, enter the third house on the left, the one inhabited by the infected. Go to the bathroom and above the cup you will find the note.
In the hinterland
# 2 - Letter from Abby
Inside the boat, by the sink.
# 3 - Job Note
As soon as you enter the crash zone, head into the house on the right. On the counter inside the garage you will find the note.
# 4 - Run away
At a certain point to access the next area you will have to cross a villa by entering through the window. Go down to the ground floor and, on the kitchen table, you will find the note.
The Resort
# 5 - Letter from a slave from Santa Barbara
After seeing the cutscene of the slaves above the train car, go immediately to the left. You will notice some blood follow it until you get to a corpse with the note at its feet. Now you can continue the path by passing under the other car and breaking the net.
# 6 - Letter from the House of Rats
Go past the training ground, go up to the second floor of the house by going up the spiral stairs and go immediately to the right. On a bedside table you will find the note.
Hoping that the text was useful to you, we would like to refer you to our guides section, where you can find in-depth material on The Last of Us Part 2 and further titles.


![Bioshock Infinite: guide / solution of secondary missions [vox codes and crates]](/images/posts/fbfe69b55a131f3c16227717280d01bf-0.jpg)
![DOOM: how to take the BFG 9000, the most powerful weapon [PS4 - Xbox One - PC]](/images/posts/b13b93f3b4ebdd6fa48f17f6c7dc359a-0.jpg)
![Battlefield 1: How to Earn War Titles [PS4 - Xbox One - PC]](/images/posts/52b3bff2367070dd39805adccc452239-0.jpg)

![Sniper Elite V2 - Tips for completing the game on maximum difficulty [sniper elite]](/images/posts/dc31eccf67ba315385e74112bba5d4bb-0.jpg)
![Mafia 3: Guide to Finding All Hot Rod Newspapers [PS4 - Xbox One - PC]](/images/posts/317e6daa9ea22897d40edc5249821bd6-0.jpg)


![ZombiU - Full Video Solution [Wii U]](/images/posts/e002d9fa98cbd6a3af45a3ce5b794877-0.jpg)
![Fable Anniversary - Walkthrough Video Solution [360]](/images/posts/1fa4f5bd2aaa42294387db4cca556745-0.jpg)
![Nioh: Guide to Beat Tachibana Muneshige [Boss Walkthrough, PS4]](/images/posts/2e679a5c9dd4e62090884f3d0016d6e3-0.jpg)


![Bioshock Infinite - How to unlock the Achievement / Heartbreaker Trophy [360-PS3]](/images/posts/744a69d112f7d05f57994fd94b5fdf52-0.jpg)

![FIFA 17: Guide to Shoot and Score Free Kicks [PS4 - Xbox One - PC]](/images/posts/e47924e20341a605302285a4504e1e5d-0.jpg)