


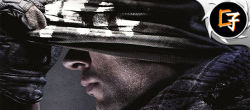
Unlike the first chapter, The Last of Us Part 2 offers not indifferent possibilities for expanding weapons. These happen thanks to specifics bolts that can be found in the course of the adventure, together with the most classic resources. To allow players to put the power-ups into practice, however, N has positioned several work benches scattered throughout the various levels. Here is our guide on where to find them all, in order to increase the firepower of your arsenal.
Before leaving you to our guide, we remind you that the following text may contain major and minor spoilers on The Last of Us Part 2. These in several cases concern details of the game script, but also more or less advanced playful insights. With either category, you may run into enough detail to undermine your pad experience. In the event that you have not concluded the experience and do not want to incur any kind of advances, we advise you not to continue with the reading of the following text.
The workbenches will be really essential over the course of the experience, and by finding more of them you can upgrade each of the guns present in The Last of us Part 2.
- Guide to find all the coins
- Guide to find the Carved Ring
- Guide to finding the Relic of the Sages
- Complete guide to crafting
- Guide to weapons and their modifications
- Guide for all diary entries
- Code guide for each safe
- Guide for the Platinum Trophy
- Guide to all the infected and how to defeat them
- Guide to skill upgrades and manuals
- Seattle Gate Codes Guide
- Guide to find all artifacts
- Guide to find all collectible cards
Jackson
Patrol
#1
After starting the generator, you will find the first workbench (mandatory for the story).
Seattle - Day 1
City Center
#1
In front of the music store there is a military tent, it's inside there.
Capitol Hill
#2
At the gas station, inside the garage where it says "oil changes".
#3
In the martial arts center, inside a sort of office.
The Tunnels
#4
After seeing the Clicker and before using a rope to reach a ladder, you will find a door to the right of the clicker.
Seattle - Day 2
Hillcrest
#1
In the clothes shop, through a hole in the wall (which will take you to the lower level).
#2
After solving the puzzle of the waste bin, in front of the crack you passed through.
The Seraphites
#3
Leaving the apartment you are in, going towards the one opposite, you will find a workbench in the kitchen. Using it, the assault by the WLF will start.
#4
In the Weston Pharmacy.
Seattle - Day 3
Towards Aquarius
#1
On the way with Jesse, enter the IIIDI shop accessible through a hole below, advance to the first door forward, turn left, go under the beam inside the open door on the right, the workbench is on the left.
#2
After climbing the destroyed building with Jesse you will find the table after a door, it is a gray desk.
The Submerged City
#3
Shortly after Ellie's boat stop, going left will find some sort of garage.
#4
Above the W&B Arcade you will find a workbench to the right of the Jak X cabinet.
Seattle - Day 1
On foot
#1
After entering Mel and Alice, go through the door that Manny opens and you will find a room with a yacht and the workbench.
The Outpost
#2
In the tent with the ammunition.
Hostile Territory
#3
In the camp of the Seraphites.
The forest
#4
In the mechanic's shop, after killing the hyena with the hammer.
The coast
#5
After leaving Lev and Yara, in the building with the celestial wall.
Seattle - Day 2
The Shortcut
#1
In the corner of the room where you will find the artifact next to the corpse.
#2
After seeing the glass with the prophet of the Hyenas painted on it.
Epicenter
#3
To the left of the electricity generator.
Seattle - Day 3
Isola
#1
In the same building where you will find the diary of the young seraphite on the bed.
The Leak
#2
After making Lev climb the ladder, you will enter a room with an open window.
Santa Barbara
In the hinterland
#1
It is located right in the kitchen, opposite.
The Resort
After breaking the net and entering a new area, you will find the workbench in the structure in front of the clicker held in chains.
Hoping that the article has been useful to you, and that you have located all the workbenches present, we particularly want to refer you to our section of guides, where you can find useful material on this and other titles.

![Bioshock Infinite: guide / solution of secondary missions [vox codes and crates]](/images/posts/fbfe69b55a131f3c16227717280d01bf-0.jpg)
![DOOM: how to take the BFG 9000, the most powerful weapon [PS4 - Xbox One - PC]](/images/posts/b13b93f3b4ebdd6fa48f17f6c7dc359a-0.jpg)
![Battlefield 1: How to Earn War Titles [PS4 - Xbox One - PC]](/images/posts/52b3bff2367070dd39805adccc452239-0.jpg)
![Sniper Elite V2 - Tips for completing the game on maximum difficulty [sniper elite]](/images/posts/dc31eccf67ba315385e74112bba5d4bb-0.jpg)
![Mafia 3: Guide to Finding All Hot Rod Newspapers [PS4 - Xbox One - PC]](/images/posts/317e6daa9ea22897d40edc5249821bd6-0.jpg)


![ZombiU - Full Video Solution [Wii U]](/images/posts/e002d9fa98cbd6a3af45a3ce5b794877-0.jpg)
![Fable Anniversary - Walkthrough Video Solution [360]](/images/posts/1fa4f5bd2aaa42294387db4cca556745-0.jpg)
![Nioh: Guide to Beat Tachibana Muneshige [Boss Walkthrough, PS4]](/images/posts/2e679a5c9dd4e62090884f3d0016d6e3-0.jpg)


![Bioshock Infinite - How to unlock the Achievement / Heartbreaker Trophy [360-PS3]](/images/posts/744a69d112f7d05f57994fd94b5fdf52-0.jpg)

![FIFA 17: Guide to Shoot and Score Free Kicks [PS4 - Xbox One - PC]](/images/posts/e47924e20341a605302285a4504e1e5d-0.jpg)