We offer you a collection of 32 tricks for Google Photos, the application to store photos in the Google cloud that also serves to view and manage those you have on your mobile locally. Google pampers this application, offering everything from a wizard to facilitate tasks to an artificial intelligence to recognize who or what is in the photos.
Google Photos, the complete guide
Therefore, today we will provide you all kinds of tips and tricks in so that you can get the most out of the best photo application, from the simplest tasks to the little options that are hidden and that can make your life in the photo cloud that little bit easier.
1. Quickly browse your photos
Google Photos organizes the photos you upload chronologically, which means that to navigate through them you just have to scroll until you reach the specific date you are looking for. However, this can get pretty tedious if you've uploaded hundreds and hundreds of photos, so it can be helpful to know that there is a faster way to scroll between them.
When you browse photos, if there are a lot of them you will see that a button appears on the right side of the screen to scroll. Hold that button on the right side and slide it to move faster among the photos. So you don't get lost, when you do, the app will show you the dates next to the button.
Read also: How to hide photos on Google Photos
2. Pinch the screen to change the display to Google Photos
Another good way to browse your photos faster is to change the way the app shows them to you. By default, Google Photos shows you four images in the width of the screen, but this is something you can change as if you were zooming the application simply making the pinch gesture on the screen. Explore the photos as you like to see the photos in the most comfortable way possible.
- Pinch to zoom out, making photo thumbnails smaller
- Pinch to zoom.
3. Quickly select multiple photos
A little trick to quickly select multiple photos at once. Hold your finger on a photo until you select it, then scroll to automatically select the rest of the photos you cross. When you lift your finger, you will choose the last selected photo and they will all be marked from first to last.
4. Automatically remove the geolocation of the photos
If you are planning to share a photo and are concerned about your privacy, the app also has an option that allows you to configure Google Photos to automatically remove geolocation metadata from your photos when you share them with a link. It's an option that you just have to toggle on or off to apply it to all photos.
- Swipe the screen from the far left to the center to view the options menu.
- Click on the Settings option
- Enable or disable the Remove Geographic Location option
5. Search for photos using Google AI
Google implements facial recognition algorithms in its photo app and you can use them to search for photos. Eg, you can search for terms like cat or jumper and Google Photos will analyze the photos you have uploaded and will be able to identify the search and show you in the results the photos of cats or jumpers you have uploaded
The funniest thing is that you can also search the keyboard emojis. If you put emojis with glasses, the photos of the people with glasses that you uploaded will appear, and if you put that of an animal, Google Photos will search for that animal in your photos.
6. Remember where, how and when you took each photo in Google Photos
When viewing a photo, slide towards'high to open a screen with all the EXIF data of the photo. You will see a panel showing the date it was taken, its resolution and weight, the megapixels it has, the camera it was made with and the shooting data.
A map will also appear underneath where the exact point where you took the photo is marked, although this already depends on the information that the mobile phone or camera with which you took it and if it had geolocation activated.
7. Add descriptions to your photos to find them
One of the parameters used by the Google Photos search engine are the descriptions in the images. Therefore, you can add descriptions to specific photos in so you can quickly find them by searching for the terms you used in these descriptions. It can be useful for those photos that you know that sooner or later you will want to revisit
To add descriptions you need to do the following:
- Click on a photo to see it in full screen.
- Press the i icon for information that will appear at the bottom of the photo.
- Tap the Add a description field that appears mostly.
- Write the description you want in the photo to find it later more easily.
Related article: How to recover deleted photos and videos on Android and iOS?
8. Use dates and locations in searches
In addition to recognizing or describing faces and objects, the Google Photos search engine will also use the metadata of your photo to locate it. This means that if you are looking for locations like Naples, Google Photos will analyze where that location is and use the geolocation data of the photos to show you which ones are where you told them.
You can do the same to search for photos based on their date. Type months like February or years like 2016 in the search engine and the results will show you the photos that were taken in the month or year you asked for.
9. Choose which folders to upload to the cloud
This app uploads camera images by default, so every time you take a photo, it will be stored in the Google cloud. AND if you want to use other albums or folders as well what do you have on your mobile? Well rest assured, you have a way to configure which folders the photos are uploaded from.
- Swipe the screen from the far left to the center to view the options menu.
- Click on the Settings option
- Now go to the Backup and Sync option
- Once inside, now click on Device Folder Backup and choose the ones you want to copy.
- You can also do this from the Device Folders option in the drop-down menu.
10. Upload photos also from your computer
Google also has a tool for make backup copies of your ccomputer. It is called Backup and Sync and you can download it from this website. With it, you can configure certain folders with photos and videos on your computer, as well as the quality of its contents, so that it is automatically uploaded to the Google Photos cloud.
Read also: How to recover deleted photos from Google Photos
11. Clean your account of unnecessary photos
When we set up our mobile to share photos in the cloud, it is very common that we end up uploading screenshots, card photos or other documents and a lot of photos of this type that we don't really want to save. The application recognize content that is expendable and that we have only used for a short period of time and will automatically invite you periodically to remove all of this content.
You can also remove duplicate content to save space as follows:
- Swipe the screen from the far left to the center to view the options menu.
- Tap the Free up space option.
12. Put filters on a photo on Instagram
Google Photos also has a number of filters a lot similar to those of Instagram which you can apply to any of your photos. All you have to do is click on them to open them in full screen and choose the appropriate option.
- First open the photo in full screen
- When you do, click on the three horizontal lines icon that appears at the bottom
- In these settings, the option on the left is the filters one and under the photo you will see them all
- Now you just have to scroll through the filters and see what the photo looks like with them
- When you have what you like, hit the Save button at the top right to make a copy of the photo with the filters
13. You can also cut, rotate and make manual adjustments
When you are in the photo editing options you can do more than just apply filters to Instagram. You'll also have some manual adjustments to control color and lighting aspects of the photo, as well as others to move, straighten, or crop it however you like.
Related article: How to download high-quality Instagram photos (with and without programs)
14. Editions and automatic assemblies
The Google Photos algorithm is a very important element of the application and among its many functions is the photo editing and automatic editing. To do this, it detects when there is an interesting image (for example, a photo of a monument), processes it by itself in the cloud and sends you a notification informing you that it has created a composition from it.
When Google Photos creates these compositions for you, you can save or discard them, always with the certainty that whatever you do, you will not lose the original photo that was used to perform the mounts or modifications.
16. Sacrifice of quality for infinite space
When you upload photos in the original quality in which you took them, the space of Google Photos is limited and if you want to have more space that it offers you in your cloud, you will have to pay. However, you can allow the app to slightly compress your photos in exchange for infinite space.
If we choose to compress photos in high quality, all those that exceed 16 megapixels are reduced to this amount and, in the case of video with a quality higher than 1080p, it is also reduced to Full HD. If you see that this is enough for you, here are the steps you need to take to change the image quality settings:
- Swipe the screen from the far left to the center to view the options menu.
- Click on the Settings option
- Once inside, click on Backup & Sync
- There, click on Image Quality, where it will indicate how the memory changes with each of the two options.
17. Scan photos and documents
Google has another tool called FotoScan, which is specially designed for digitize photos by turning your mobile into a scanner. You can use the application without having to have Google Photos, but in the Google Photo app there is a link in the drop-down menu for you to use it.
To download the application, go to your profile on Google Play or the App Store. So, put the photo in front of the camera sensor making sure there is good lighting, press the Take Photo button and follow the instructions to position the camera in the four points of the photo it points to. The app will do the rest to mount the scan from there.
Read also: How to hide the WhatsApp profile photo from a contact without blocking it
18. Or cut out photos from documents
On Android you have scanner applications, such as Office Lens or CamScanner, and Google Photos also integrates a link to FotoScan. But Google has added a feature that allows you to crop and change the perspective of a document photo in so that it is as if you have scanned it.
- First of all, take a photo of a document with your mobile's camera application
- Enter Google Photos and click the photo
- Click the Edit Photo button
- Now click on the Extensions and Other Applications button that appears to the right of the whole, with an icon showing nine dots that form a square
- Choose the Cut Document option
- Move the four points to leave only the selected document and press Done
19. Create shared albums
When you are in the application, if click on the share option in the bottom row of options, you can create albums that are shared with other people. The process is simple, you just have to choose the photos for the shared album, then choose which other person or people you want to join to be able to upload your photos. A good solution for the memories of those shared holidays.
In the drop-down menu on the left you also have the Add Contributor Account option, which allows you to invite someone to collaborate on your photo library. You can choose to share all your photos, those of certain people or those of a specific day, with her.
20. Share specific photos with anyone
When you post a photo on a specific screen, you also have the option to share it. This option will allow you to send one or more photos to certain contacts at the same time, either through Google Photos or through any other application, by generating a link that you can send by any other means. Google Photos will change the privacy of the specific photo or photos, but those who receive the links won't be able to see more photos than you decide.
21. Watch your photos on TV with your Chromecast
Are you connected to a WiFi network where a Chromecast is configured? So you can send one or more photos to the TV in a very simple way. When the mobile detects that you are using the same WiFi as a Chromecast or compatible device, you will see the icon to send content to Chromecast, which is the one with a rectangle with three waves coming out of one corner.
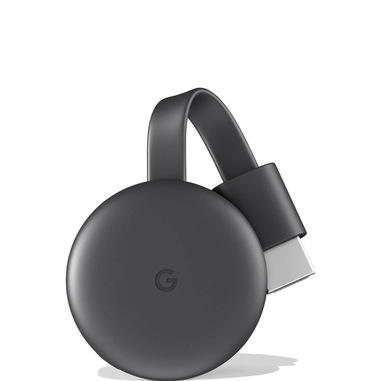
When you click on it you will only have to select the Chromecast where you want to see it and with this function you will be able to see an image or the entire album of your holidays on TV. You can also tag only certain photos from your mobile to not show more than you should.
22. Delete photos from mobile, cloud, or both sites
If you have Photos set up as an application to view photos by default, each time you delete one you can choose whether to delete it from your mobile, the cloud or both sites at the same time. This way, if it is a repeating photo, you can delete it from all places and if you just want to free up space on your mobile, you can delete the photos by keeping them in the cloud.
23. Recover photos you accidentally deleted
Google Photos will store deleted content for 60 days in the trash folder, which can be accessed from the sliding menu on the left. That way, if you've accidentally deleted a photo, you'll always have the option to restore it.
But if you are a neat and save freak and just want Google to forget these deleted photos so that they are permanently deleted, in the trash option you can also select the ones you want and hit the Delete button. This way they will also be deleted from the recycle bin and will be lost forever.
24. Store photos in Google Photos to hide them
If there are specific photos that you don't want to see on the main screen, the application will give you the option to archive them. In doing so, the photos will be saved in a specific folder that you can access whenever you want, such as a collection in your photo gallery. The photos will no longer be displayed on the main screen, although they will continue to appear in albums and search results.
- To archive a photo, first hold your finger on it to select it
- At the top right, click the three-dot icon next to the trash can
- Select the Archive option
25. Or save them to your favorites
When you are viewing a photo in full screen you will also have a star icon to save it as a favorite. When you mark a favorite, the favorite album will be created, which you can quickly access in the Albums section you have in the bottom row of options
26. Access only your videos, films or animations
When you tap on the app's search bar, the first thing you'll see is a list of the latest searches you've done. But right below you will see a series of icons, including favorites or videos. If you click on the video icon under your search history, Google Photo will automatically show you only the videos that you have uploaded to the cloud.
Likewise, other options such as movies, animations, collages or FotoScan. Therefore, if you have used one of these tools to create content, you can also access it quickly.
27. Take your photos on the go
If you have a mobile capable of take pictures while six in movement, Live Photos on iPhone, Google Photos will also allow you to save them to the cloud. In the case of the former, such as those made by Pixel, a button will appear in the upper right corner to indicate whether you want to play the animation or not.
28. Post your Google Photos videos on YouTube
The YouTube website has an interesting feature in its section for uploading videos, and that is that it will allow you to publish videos directly from your Google Photos cloud. This will automate the process of downloading them to your mobile or computer, and then uploading them to the web from there, everything will be done from the cloud.
Also think of this as an opportunity to take advantage of Google Photos tools like creating videos from the ones you've uploaded. You can create your own video compositions and then upload them directly to YouTube with this option.
29. Group photos by the faces of those who leave
Google Photos has another option with which you can group photos based on the faces of those who appear in them. It is an option that you have to activate and in this case Google will group all the faces in different albums. So you just have to name each face and that's it, when you later search for that name all the photos will come out where you identify that person. In Spain it is already available, but there may still be countries where the option has not yet arrived.
- Enter your Google Photos settings
- Give the option Group similar faces
- Within that option, turn on Grouping by faces
- Now wait a few minutes or now for Google to group the faces
- On the Albums tab, tap the new album called People
- Inside, click on each of the faces and go by giving it a name
30. Rediscover what you were doing exactly one year ago
Google Photos has also integrated a new option called Memories. It is something automatic with an aesthetic similar to Instagram stories, but with the difference that only you can see the photos that appear there.
The idea is simple.When you log into the application, in the section photo you will see a section called Remember up. There, Google Photos will group photos taken (and uploaded) on the same day today, but from a different year. It's a curious way of remembering that a year ago you were having a wonderful vacation while today you have to go to the office.
31. Take advantage of your assistant on Google Photos
If you don't know where to start with the many possibilities of Google Photos, go to Assistant section of the lower menu for assistance in exploring some advanced features. Do you want to make a collage? You can do it from there. Do you remember the photos from years ago? He will show them to us. Delete old images?
It's a lot of fun to explore with the ways to create movies or montages so you can get pretty cool results without any editing skills. By proxy, you can even create and purchase your own physical photo album using the steps provided by the application wizard to guide you through the process.
32. Download a copy of all your Google Photos photos
Although we have suggested above that you can sacrifice photo quality for infinite space, if you have purchased space and you have uploaded all your photos in original quality, the application can help you make a perfect backup of them all. And if for some reason you have lost the copies you have on your computer, you can always download a full backup of all those on Google Photos.
To do this you need to go to Google Takeouts and set up a new backup. In it, include content from Google Photos only and voila, when it arrives you will already have all the ones you uploaded. Remember that in order not to lose quality, if you want to do this you must have uploaded them with their original quality.
Related article: How to download videos from Google Photos to your phone


![Serial Windows 10 [Product Key]](/images/posts/81d208d8c702822ef472df6012c6c29d-0.jpg)