Through this step by step guide, you will learn how to unlock bootloader, install TWRP recovery and simultaneously root Samsung Galaxy Tab S6 via Magisk. This guide is compatible with the SM-T860 (WiFi) and SM-T865 (LTE) model numbers of the Tab S6, running Android 9 Pie or Android 10.
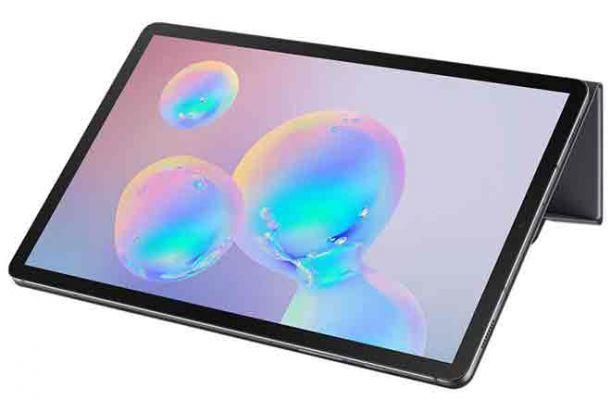
In the era where most of the major manufacturers have retired from creating Android tablets, Samsung is still in the game. The manufacturer refused to give up its Galaxy Tab line and released the Galaxy Tab S6 in July 2019. And it's truly the only Android tablet that can compete with Apple's iPad.
The Tab S6 features a 10,5-inch OLED screen that supports HDR10 / 10 +, powerful Snapdragon 855 processor, four corner speakers with Dolby Atmos enabled, and an S Pen that can be docked directly onto the back of the card. On the software side, it runs Android 9 Pie with Samsung's One UI skin placed on top.
There is no doubt that Samsung has readily improved its software with One UI over the old Samsung Experience. But if you're looking for more, more customization, and more control over your tablet's software, you may find yourself prone to the rooting process. Rooting your Samsung Tab will not only allow you to use root applications, it will also give you the ability to customize the tablet software to your liking.
You can root your tablet in two different ways, that is, using TWRP or without it. In this post, we will focus our attention on the first one, which is to first install TWRP recovery on Samsung Galaxy Tab S6 and then flash Magisk through it to get root permissions. To do this, you must first unlock the bootloader as well.
The instructions in this guide will walk you through all of these things in an orderly and step-by-step manner. It doesn't matter if you are a newbie or a veteran in the field of Android modding, you will be able to follow and execute these instructions quite easily.
Important information
Make sure you fully understand the things listed below before proceeding with the instructions.
- Installing a custom binary like TWRP and rooting your Galaxy Tab S6 will void the official warranty offered by the manufacturer.
- The process will do spring also the KNOX counter, which is irreversible. This means that you won't be able to use apps and services like Samsung Pay and Secure Folder, even if you unroot the device and restore the stock firmware using Odin.
Before starting
Meet all the requirements listed below.
- All data on your Galaxy Tab S6 will be erased while following the instructions below. So, make sure you've made a full backup of all your important data before proceeding. If you wish, you can refer to this detailed guide on how to perform full backups.
- Charge your tablet to a sufficient battery level. This will prevent the phone from accidentally turning off during the process.
- Download and install the latest version of Samsung USB drivers on your PC.
- You will use ADB and Fastboot tools to flash files on your phone. So, download the latest Android SDK platform tools pack from here and install them on your PC using this guide.
- When asked to launch the command line window on your PC, do the following:
- On Windows PC: Open the folder where the Android platform tools are installed (for example C: platform-tools). Then hold down the SHIFT key on your keyboard and right-click on an empty space inside this folder. Select the option "Open PowerShell window here".
- On macOS / Linux PC: open the "Terminal" and change its directory to the folder where the Android platform tools are installed. For example, if the tools are installed in / Documents / platform-tools, enter the following command:
cd Documents/platform-tools
- All commands in this guide must be preceded by “. ”(Full stop and backslash) when logging in on a Windows PC, or from“ ./ ”(full stop and backslash) when logging in on a macOS / Linux PC.
Download
TWRP for Galaxy Tab S6 is developed and maintained by XDA Recognized Developer Mentalmuso. It has posted both official and unofficial builds in the official XDA thread.
Important Note:it is recommended to use the unofficial TWRP as it is updated more frequently and has better support from the developer. Additionally, the WETA kernel is only required for Android 9 Pie and optional for Android 10.
- Latest unofficial TWRP builds and WETA kernels:
- SM-T860 (variante WiFi):TWRP_T860_3.4.0-15.tar | WETA_Kernel_T860-6.1_TF1.zip
- SM-T865 (variante LTE):TWRP_T865_3.4.0-15.tar | WETA_Kernel_T865-6.1_TF1.zip
- Official TWRP builds (not recommended, but links have been posted for documentation purposes)
- SM-T860:twrp-3.3.1-1-gts6lwifi.img.tar
- SM-T865:twrp-3.3.1-1-gts6l.img.tar
- ZIP of the Magisk installer: Magisk-v21.0.zip
- Universal Forced Encryption Disabler (enorme grazie a Zackptg5 ):Disable_Dm-Verity_ForceEncrypt_03.04.2020.zip
Instructions
For your convenience and easy understanding, we have divided this guide and related instructions into four main steps.
In short, the first step is to unlock your Tab S6's bootloader, which is a prerequisite for installing TWRP, root, or performing any kind of software changes. Then the second step is to flash TWRP recovery on the tablet using Odin and then launch it directly.
This is followed by the third step, where you need to format the / data partition and reboot the tablet into TWRP. Finally, the fourth and final step is to flash the Forced-Encryption Disabler, WETA kernel, and Magisk ZIP files to disable encryption and simultaneously root your Galaxy Tab S6 using Magisk.
Please read the “FAQ” section at the bottom of this post before proceeding with the steps. It will eliminate some of the most common questions you may have. Now without delay, let's get started with the instructions.
Step 1: Unlock the Bootloader
Go to “Settings” → “About phone” → “Software information” on your Galaxy Tab S6. Then tap continuously on the "Build number" section until you see the message "Developer mode enabled" on the screen. Developer options should now be enabled on your tablet. Log in by going to “Settings” → “Developer Options” and activate the “OEM Unlock” switch.
- Final report: in case the “OEM Unlock” switch is not visible, connect your Tab S6 to WiFi / mobile data and try again.
Now turn off the tablet completely. Once turned off, connect the tablet to the PC via a USB cable while holding down the Volume Up and Volume Down keys at the same time. You should now see a blue warning screen. Now, long press the Volume Up key to enter the device unlock mode and start the bootloader unlock process.
On the next screen, press the Volume Up key once to confirm and unlock the bootloader on Samsung Galaxy Tab S6.
The tablet will perform a factory reset (erase all data) and reboot into the operating system. Once done, set up your device by following the onscreen instructions. Finally, enable Developer Options on your tablet again and make sure the “OEM Unlock” switch is turned on and off. If it is, it means that your Galaxy Tab S6 bootloader has been successfully unlocked.
Step 2: Install TWRP Recovery
With the bootloader unlocked, you can now flash and install TWRP recovery on your Galaxy Tab S6. To get started, download the latest TWRP recovery TAR file from the “Download” section on your PC. Make sure you download the recovery file according to your tablet model / variant number, this is SM-T860 (WiFi variant) or SM-T865 (LTE variant).
After that, download the latest Odin tool on your PC and extract the contents of the downloaded ZIP file. Then start the Odin tool on your PC by double clicking on the “Odin3 v3.14.4.exe” executable file.
Now completely shut down your Tab S6 and start it in download mode. To do this, connect the tablet to the PC via a USB cable while simultaneously holding down the Volume Up and Volume Down buttons.
As soon as the device enters download mode, Odin will detect it and the corresponding serial port number will be shown in the “ID: COM” section of the instrument. If not, it is very likely that your PC is missing the correct USB drivers. Simply download the latest drivers from here, install them on your PC and restart it.
At this point, your device is ready for flashing. Then, click the 'AP' button in Odin and select the TWRP recovery TAR file you downloaded ('TWRP_T860_3.4.0-15.tar' for SM-T860 or 'TWRP_T865_3.4.0-15.tar' for SM-T865 ). Before flashing, make sure you uncheck the “Automatic restart ”In the“ Options ”menu of the Odin tool.
Finally, click the “Start” button in Odin to flash and install TWRP recovery on your Samsung Galaxy Tab S6. The flashing process may take a couple of seconds. When finished, you can close the Odin tool by clicking "Exit".
Important Note:It is extremely important to force restart your tablet directly into TWRP recovery after step 8 below. If your tablet also attempts to enter the system (OS), it will end up in a bootloop due to the KG / RMM status activated and you will not be able to perform any further steps. To fix this, you will then need to restore the stock firmware and wait 7 days until the KG status returns to “Verify”, and only then will you be able to reinstall TWRP.
So read carefully the instructions listed below and run them as they are. To force restart in TWRP mode:
- First, exit the download mode by holding the Volume Down and Power buttons at the same time until the screen turns off.
- As soon as the tablet screen turns off, release the Volume Down button and quickly press and hold the Volume Up and Power buttons to force restart into TWRP recovery.
Your Galaxy Tab S6 should now be in TWRP recovery mode.
Step 3: Format your data and restart the recovery
Once TWRP is installed, you will need to do a few other things to get it fully functional and to properly boot your Tab S6 into the system after rooting.
The first thing you need to do is format the partition / data of your Galaxy Tab S6. This will decrypt the tablet's internal memory and allow TWRP to read / access it (to flash, store NANDroid backups, etc.). To do this, go to 'Wipe'> 'Format Data' from the TWRP main menu. Then enter "yes" in the field provided to format the partition / date.
Once formatted, go to the “Reboot” menu in TWRP and press “Recovery”. This will restart the tablet in TWRP recovery mode. Since you have formatted the aforementioned partition, a reboot will be essential for TWRP to recognize it. Once your Tab S6 reboots into TWRP, it will be ready to root.
Step 4: Flash Encryption Disabler, WETA Kernel and Magisk ZIP to Root Galaxy Tab S6
Now, even if you have decrypted the data partition, it will be encrypted again on reboot. To prevent this from happening, you need to flash the provided encryption disable ZIP file. This file will make the necessary changes in the kernel to completely disable Samsung encryption. Next, you can flash the WETA custom kernel (only needed on Pie, optional for Android 10) and finally the Magisk ZIP file to finally root your Galaxy Tab S6.
Follow the instructions listed below to do this:
- Go to the “Mount” menu in TWRP and press the “Enable MTP” button. If it already shows “Disable MTP”, it means MTP mode is already enabled.
- Connect your Tab S6 to the PC via a USB cable.
- Download the Encryption-Disabler, WETA kernel and Magisk ZIP files to your PC.
- Transfer all three downloaded ZIP files to your tablet's internal storage.
- Once transferred, disconnect the tablet from the PC and return to the TWRP main menu.
- Important : Before flashing any file, go to the “Mount” menu in TWRP and make sure that the “system” partition is unmounted. If it is mounted, be sure to take it apart first.
- Hit the 'Install' button in TWRP and go to the location where the files were previously transferred.
- First select the Encryption-disabler file (Disable_Dm-Verity_ForceEncrypt_03.04.2020.zip) and then tap the “Add more zip” button.
- Then, select the WETA custom kernel file ('WETA_Kernel_T860-6.1_TF1.zip' for SM-T860 or 'WETA_Kernel_T865-6.1_TF1.zip' for SM-T865) to add it to the flashing queue.
- Note: the Flashing this custom kernel is only required if Android Pie is installed on your Tab S6. For Android 10, it is optional.
- Now tap the “Add more zip” button again and this time select the Magisk installer ZIP file (Magisk-v21.0.zip). At this point, you have all the files added to TWRP's flashing queue.
- Slide the button at the bottom of the screen to flash all files and finally root your Galaxy Tab S6.
At the end of the flashing process, press the “Reboot system” button.
When your Galaxy Tab S6 boots into the system (OS), it should be rooted with Magisk and have a fully functional TWRP recovery. Now you can go ahead and use root applications or use MagiskHide to hide the root from apps that may stop working after detecting it, such as Google Pay, Pokemon Go, etc. You can also install audio mods like ViPER4Android and use TWRP to flash custom kernels / ROMs / mods.
FAQ
Question: the download mode shows the error message “Only officially released binaries are allowed to be flashed”, what should I do?
- Answer: This error means that the Prenormal KG status has been activated on your Tab S6. You can confirm this by looking at the information at the top of the tablet screen while it is in download mode. This is normally caused when you are unable to boot the tablet directly into TWRP mode after flashing and attempting to boot into the system.Once the Prenormal KG state is activated, you will need to flash the stock firmware using Odin, then boot the tablet , connect it to the Internet, log into your Google account and wait 7 days. After this 7 day period, you will again be able to flash the TWRP and execute the instructions further. You can download the latest firmware using Frija Tool and follow the instructions to install in this post.
Question: I would like to keep the memory of my Tab S6 encrypted, is this possible?
- Answer: Yes, you can encrypt your tablet's storage. But this also means that TWRP will not be able to read / access the tablet's internal memory. Then, you will need to use a micro SD card (external storage) to flash any file or to make NANDroid backups.
Question: I have installed the WETA custom kernel and my tablet does not boot, what should I do?
- Answer: this is common if you have installed an older version of the kernel. If your Tab S6 is running Android 10, always make sure you are using the latest version of the WETA kernel if you plan to install it. If your tablet has already entered a boot loop due to a wrong flash, simply reboot into TWRP, download the latest kernel and install it. This should fix the problem and allow your Tab S6 to boot into the system.
So here you are! You just learned how to root Galaxy Tab S6 using Magisk and install TWRP recovery on it. If you have any questions regarding the process or the instructions in this post, please feel free to contact us.
We couldn't finish this post without thanking XDA developer mentalmuso who is in charge of developing a stable TWRP build and maintaining it consistently. He also provided immense user support via the official Telegram channel. So please consider visiting the thread or group and show them your appreciation. Source


![Serial Windows 10 [Product Key]](/images/posts/81d208d8c702822ef472df6012c6c29d-0.jpg)