Make one screenshot it is a procedure that may seem difficult to many, especially if you are not familiar with the technology and if you do not know perfectly the device you are using. In reality it is not so, and with today's guide it is my intention to clarify the matter.
In this tutorial I will not only explain to you come fare screen on Windows PC and Mac, but also how to take screenshots on Android and iOS/iPadOS mobile devices with step-by-step directions for all operating systems. You will see that it will be impossible to go wrong.
At that time? How about we put the talk aside and get busy? Yes? Very good! Whether you want to use keyboard shortcuts or the mouse, following my instructions you will get the desired result in no time at all, without even having to install additional programs on your devices. Happy reading and have fun!
Index
- How to make screenshots on PC
- How to take screenshots on Mac
- How to make screenshots on android
- How to take screenshots on iPhone and iPad
How to make screenshots on PC
You are using a computer with su installed Windows and you would like to understand come fare screen then? Then follow the instructions below. I anticipate that you can do it using dedicated keyboard shortcuts and tools included in the operating system. In all cases, fear not, it's very easy!
How to make screen on PC with keyboard

To make screenshots on Windows, you can first use some special ones key combinations on the keyboard. More precisely, if you are using a updated version of Windows (Windows 8.x and later), to take a screenshot showing a snapshot of the screen you are viewing, you need to use the following key combination: Win + Stamp.
In the event that the combination I have indicated above does not work, you can try using the following alternative keyboard shortcuts: Win+Ctrl+Stamp or Win+Fn+Stamp. If you're using a tablet or 2-in-1 convertible, use this combination instead: Win+Volume down key.
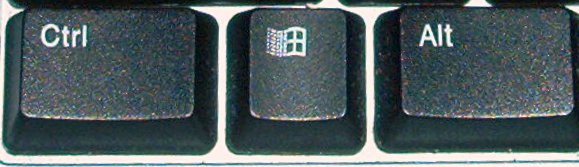
If you don't know, I inform you that the key Win is the one with the windows symbol (i.e. the window) located at the bottom left of the keyboard. Instead, the key Stamp it's the one found at the top right, usually near the key F12 or in any case after the keys Function, and on some keyboards it is shown as prnt, Prt Scr, prnt or Print and is sometimes placed on a multi-function button (so to be able to use it you must also press the key Fn).
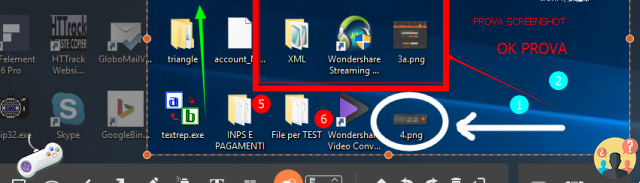
In all cases, the confirmation of the correct execution of the command, and consequently of the successful capture of the screen, is signaled by a very brief darkening of the screen. The screenshots obtained are saved in PNG format and are visible by accessing the folder ImmaginiScreenshots of Windows.
Would you need to change the destination folder where the screenshots are saved? No problem. To do this, right-click the folder Screenshot and from the drop-down menu that opens, click on the item Property, then go to the tab Route in the window that opens and indicate the output location by clicking the button Move.
As an alternative to how I just explained to you or if you are using a older version of Windows (Windows 7 and earlier), you can take a screenshot and copy it to the clipboard only, without automatically saving it to the pictures folder. To do this, simply press the key if you want to take a screenshot of the entire desktop Stamp, while to take a screenshot of the foreground window use the combination Alt+Stamp.
Later, you can paste the resulting screen into any application (e.g. Paint), by clicking on the button Paste attached to the window of the program in use or using the key combination Ctrl + V.
How to take screenshots on windows 10
As I anticipated, it is also possible to make screenshots using some tools already included in the operating system. If you are interested in this and if you are using a PC with Windows 10, you can achieve your goal by using Capture and annotate. It is a pre-installed software (if removed, it can be downloaded for free from the relevant section of the Microsoft Store) which has been specifically designed to capture screenshots and add annotations to them.
To use Capture and Annotate, first start the tool by clicking on the Start button (the one with thewindows icon) located at the bottom left of the taskbar, by typing “capture and annotate” in the search field and selecting the pertinent suggestion that you find in the menu that opens.
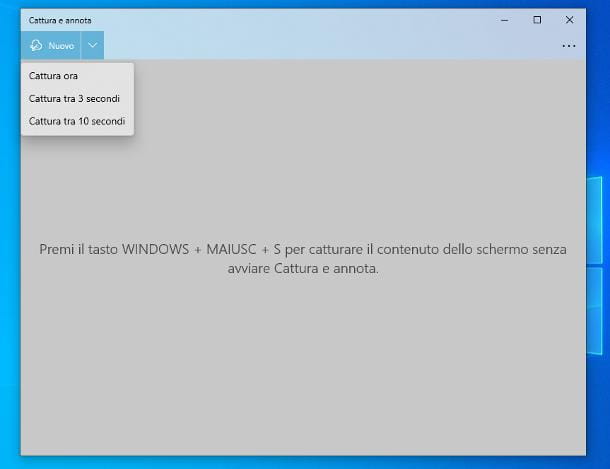
Now that you are viewing the main program window, click the button to start taking a screenshot New located in the upper left. You can also set a timer between selecting the area to capture and capturing the screen by clicking the button beforehand down arrow and selecting one of the following options from the menu that opens: Capture in 3 seconds or that one Capture in 10 seconds. To reset instant capture, choose the option Capture now.
After completing the above steps, you will see the Capture and Annotate toolbar appear at the top of the screen. Click, therefore, on one of the following buttons on it to set the capture mode you prefer: the one with the rectangle allows you to take a screenshot of a rectangular shape, the one with the curved design allows you to take a screenshot by drawing a custom shape, the one with i two overlapping rectangles allows you to capture a specific window above, while the one depicting a rectangle with the corners highlighted allows you to take a screenshot of the entire desktop.
If the selected mode requires it, also trace the screenshot capture area by clicking on the starting point and, continuing to hold down, moving the pointer to the point of your interest.
If this interests you, know that you can also invoke the Capture and annotate tool using this key combination: Win+Maiusc+S.
How to make screenshots on windows
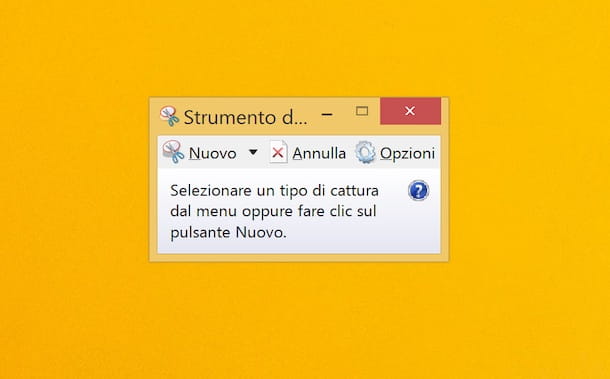
Even if it is installed on your PC Windows 8.x or a previous version of the operating system there is a "standard" tool that allows you to make screen. The program I'm talking about is called Snipping tool, is very easy to use, but integrates advanced settings with which to capture only certain parts of the screen, make highlights and/or annotations and much more.
To start the tool, click on the Start button (the one with thewindows icon) that you find at the bottom left of the taskbar, type “snipping tool” in the search field and select the pertinent suggestion that is proposed to you.
Now that you see the program toolbar on the screen, to make a new screenshot first decide the capture format by clicking on the button with the down arrow and choosing one of the following options from the menu that appears: Rectangular capture to make a rectangular shape screenshot, Capture free format to take a screenshot by drawing a custom shape, Capturing a single window to take a screenshot of a specific window or Capture full screen to take a screenshot of the entire desktop.
Afterwards, click the button New that you always find on the toolbar and if the chosen capture mode requires it, use the cross-shaped pointer to trace the area you want to "immortalize", clicking, continuing to hold down and releasing the "grip" until the point of your interest.
After completing the above steps, you will be shown the preview of the resulting image in the program editor. If you deem it necessary, you can customize it by adding strokes and highlights using the appropriate icons. Then click the button to save the image floppy disk, indicate the position, name and format you prefer and that's it.
How to take screenshots on Mac
How to take screenshot on Mac with keyboard

You are using a Mac, you would like to understand how to take screenshots and you are a lover of keyboard shortcuts? Then you will be happy to know that you can take a screenshot of the entire screen using the following key combination: cmd + shift + 3.
Need to take a screenshot of only a small portion of the screen, instead of the whole desktop? No problem. You can do it in a very simple way, using the following key combination: cmd + shift + 4. Subsequently, a crosshair will appear on the screen and you will be able to select the capture area by clicking on the starting point and, continuing to hold down, moving the pointer to the point of your interest.
If you then want to take a screenshot of a window mentioned above, proceed as follows: use the key combination cmd + shift + 4, then press the space bar and click on window that it is your intention to "immortalize".
In case you don't know, the cmd it is the one found in the lower part of the keyboard and is marked with the symbol ⌘, while the key shift is the one with the symbol of up arrow found on either side of the keyboard. There space bar it is instead the "long" key that you find at the bottom of the keyboard and that you generally use to insert spaces in texts.
Regardless of the key combination used, the computer emits a sound similar to a camera shutter to confirm that the screenshot capture operation was successful. Also, by default, all captured screenshots are automatically saved to the macOS desktop in PNG format.
I also point out that once a screenshot has been captured, if you want to edit it before it is saved, adding writings, drawings, etc., you can do so by clicking on the relative miniature that is shown to you at the bottom right of the screen, then on the buttons attached to the top of the editor that is shown to you. To save any changes made, click on the button end.
If, on the other hand, you try to take a screenshot while also holding down the key ctrl, then using the key combination cmd + shift + ctrl + 3 , the resulting image will be saved in the clipboard. This operation can turn out to paste the screen in a desired position, through the combination of keys cmd + v.
Come fare screen your macOS
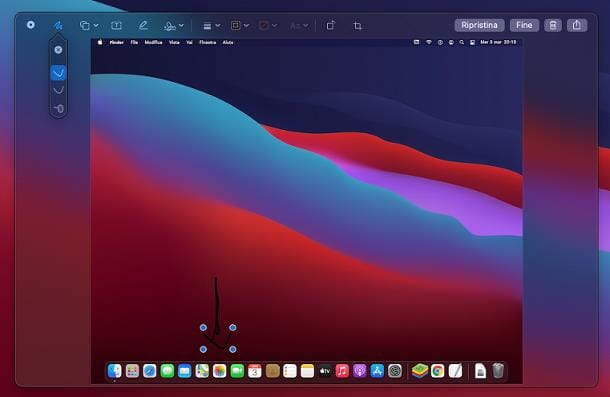
If you find Mac keyboard shortcuts too difficult, you can take a screenshot on Mac using Screenshot. If you don't know this program, I inform you that it is a "standard" macOS application, which allows you to take screenshots in a really simple way.
Then start Screenshot selecting the relative icon (the one with the window and the camera) that you find in the folder Other of the Launchpad of macOS. Then you will be shown a toolbar at the bottom of the screen: to capture the whole screen click on the symbol rectangle, to photograph a single window click on selected rectangle, while to acquire a portion of the desktop click on the symbol of dotted rectangle.
After selecting the capture mode you prefer, click on the button options to choose whether to include the mouse pointer, set a timer for the screen capture, or save the image to a specific location. Still using the same menu above, you can optionally decide whether or not to show the floating thumbnail after the acquisition or whether or not to remember the last selection made.
Successively click on your button Acquire and if necessary trace the area of the screen to be captured by pressing and holding down the left mouse button, then release the "grip".
How to make screenshots on android

As I anticipated at the beginning, taking screenshots is also possible on smartphones and tablets. In particular, if you're using Android and your device has a physical Home key, just use the following key combination: Power+Home. Instead, if the device you're using doesn't have a physical Home button, the combination to use is this one: Power+Volume down.
In case you didn't know, the power button usually found on the left side of the device or at the top of the device, while the key to lower the volume it is generally placed on the right and is marked with the symbol negative (-) lead.
When successful, a flash is shown on the screen and a camera-style sound is emitted. The screenshot taken is then automatically saved in the folder Screenshots of the device and to view them, simply start the app Photo / Gallery which is the default for managing and displaying images on the terminal.
I also point out that, once the screenshot has been taken, on many of the smartphones and tablets currently on the market, a special menu through which you can share the captured image, edit it or delete it on the fly.
In any case, keep in mind that some of the steps I have described above may vary slightly depending on the brand and model of device you have and the Android version installed on it. More info here.
How to take screenshots on iPhone and iPad
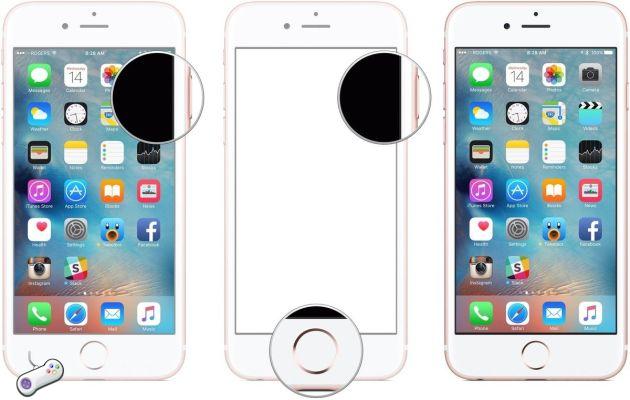
Even if you own a iPhone or a iPad you can make a screenshot quickly and easily. More precisely, if you are using a device that supports Face ID you must use the following key combination: Power+Volume su. If, on the other hand, your device has a Home button, the combination you need to use to capture screenshots is this: Power+Home.
In case you don't know, the power button is placed on the side or top of the iPhone and iPad, depending on the model, while the key to increase the volume is placed on the left. The Home button, when present, is located at the bottom center.
Note that when the screenshot is taken, a flash is shown on the screen and a sound like a camera shutter is played. The image is then automatically saved in the iOS/iPadOS gallery, accessible via the app Photo.
Also, all the screenshots taken will be shown to you as you progress miniature in the lower left corner of the device display. Pressing on it you will be able to view the screenshots in an enlarged way and access the appropriate editing tool. More info here.