Do you need to "immortalize" your computer desktop but don't know how to do it? Don't worry, this is a very easy operation. In fact, you can do it in no time at all by resorting to the use of special tools screen capture programs. It is software thanks to which you can take screenshots of your computer screen in a way that is as practical as it is fast. To use them, it is not necessary to have specific knowledge of information technology and new technologies.
There are plenty of screen capture programs out there. Some are free, others are paid; some are only for Windows, others only for macOS, still others arrive integrated "as standard" in the aforementioned operating systems. In short, as you will be able to notice yourself shortly, the choice is not lacking at all.
In addition to taking a snapshot of your desktop, thanks to the software I'm about to recommend, you can also "photograph" individual windows, customized portions of the screen and you can enrich your screenshots with arrows, writing, drawings, highlights and other content that you deem appropriate. What are you waiting for to learn more about this topic? Find it all explained below.
Index
Programs to capture the screen of the Windows PC
If you have a computer equipped with Windows, you will be pleased to know that, in addition to the countless third-party solutions, it is also possible to capture the PC screen using one of the tools integrated into the operating system. Below I'll explain how to do it.
Snip and Annotate/Snipping Tool
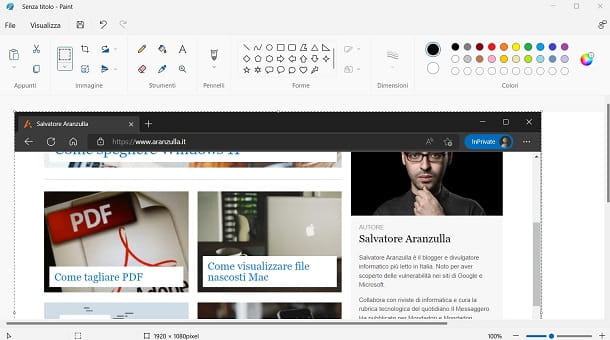
One of the solutions that I advise you to consider is Capture and annotate, a built-in “standard” utility in Windows 10 and later and responsible for the creation of screenshots. To start the program, open the Start menu (by clicking on the symbol of windows flag located on the left of the system tray) and click on the icon Capture and annotate.
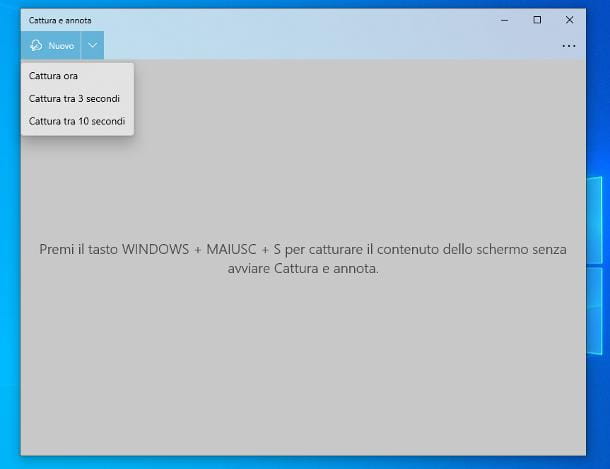
To take a new screenshot, click the button New residing in the upper left corner of the window that opens; if you wish, you can also set a delay between the selection of the area to capture and the actual acquisition, for a time ranging from 3 to 10 seconds, by clicking on the freccetta verse il basso located next to the New button.
Anyway, once the new screen capture starts, traccia l'area del desktop da fotografare pressing and holding the left mouse button and, when you're done, release the latter, to "snap" the photo.
If necessary, you can also choose a different capture mode from the one seen just now, using the toolbar that appears at the top of the screen: for example, you can draw a custom shape by clicking on the button Freehand capture (depicting a curved design); you can capture only the active window by pressing on the icon two overlapping rectangles; or, again, you can take a picture of the entire desktop by clicking on the button representing a rectangle with the corners highlighted.
Once the image is obtained, it will open in theeditor of the program, through which you can add strokes, arrows, annotations and other elements; to save the file, click on the icon floppy disk, located at the top right.
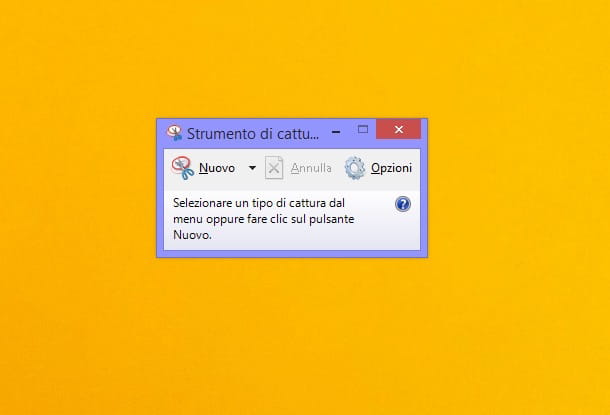
On previous editions of Windowsinstead, you can use the Snipping tool, which works in a rather similar way and can itself be called directly from Start menu.
Once the utility in question is open, click on the button New to draw the area of the desktop to capture, or on the freccetta verse il basso or on the button modality located immediately next to it, to set a different capture mode (Window capture, Capture full screen or Capture free format). If your operating system is up to date, you will see a third button, called Delays, through which you can set a timer to delay taking the screenshot.
Also in this case, once the image has been created, it will be opened in the integrated editor of the program, through which it will be possible to add lines, arrows, annotations and other elements; to save the file, simply click on the icon floppy disk, which is at the top.
Please note that Windows 8.1 and later allow you to capture the screen "on the fly" via the keyboard, using one of the following key combinations.
- Win + Stamp: Save a screenshot of the entire screen, as a PNG file, in the Pictures > Screenshots folder on your PC.
- Win+Alt+Stamp: performs the same operation seen a little while ago, but capturing only the active window.
- Win+Shift/Maiusc+Stamp: starts the capture of a portion of the screen, which must be traced with the aid of the mouse. The resulting image is saved, in PNG format, in the Images > Screenshots folder.
- Win+Shift/Maiusc+S: Opens the tool Capture and annotate of Windows 10. After capturing the screenshot, however, the image is automatically saved and not opened in the editor (which you can do anyway, by quickly clicking on the preview that appears at the bottom right).
Greenshot
As regards, however, third-party software, Greenshot is an excellent alternative to consider: it is a free program for Windows, which allows you to quickly capture the screen and save the images obtained in multiple formats.
If you are interested in going this route, first connect to the Greenshot download page and click on the button depicting the windows logo and the wording Latest Stable, to get the program installation package.
When the download is complete, open the file obtained (eg. Greehshot-INSTALLER-xy.exe), make sure the option is selected in the drop-down menu that appears on the screen English (or any other language you prefer, among those supported by the program) and click on the button OK, to start the setup procedure. Now, put the check mark next to the entry I accept the agreement, award-winning NEXT for 7 consecutive times and then on the buttons install e Finish, in order to complete the installation of the program and start it in the background.
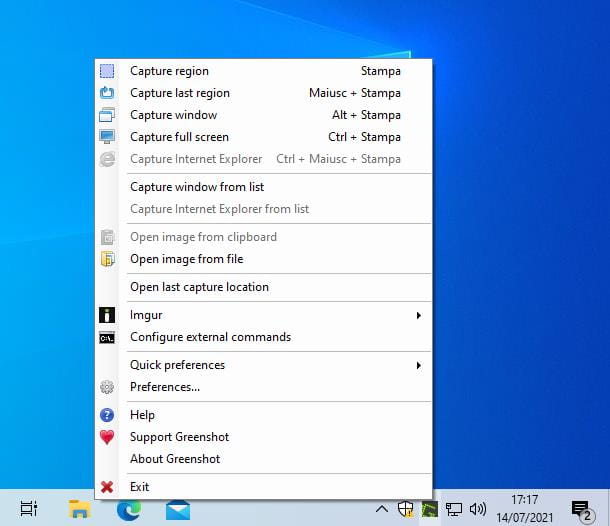
Now, to take a screenshot, locate the Greenshot icon (the Green G on a gray background) among those placed next to the system clock and click on it; if you don't see it, click on the symbol up arrow e drag the Greenshot icon in the area dedicated to always visible icons, so as not to hide it anymore.
After clicking on the icon in question, you should see a menu containing the various capture options: Capture region, to draw a portion of the screen to be photographed; Capture last region, to automatically capture the last drawn area; Capture window, to capture one of the active windows; or Capture full screen, to capture the entire screen.
If you have chosen to capture a portion of the screen, you will have to draw it by pressing and holding the left mouse button and define it by releasing it; if instead you have selected the option to capture a given window, you will be asked to select it by clicking on one of the edges; the capture of the entire screen, on the other hand, will take place instantly.
Note: When Greenshot is running in the background, you can also take a screenshot using the keyboard. The key combinations to press are as follows: Stamp, to start capturing a portion of the screen; Shift/Shift+Print, to capture the last selected area; Alt+Stamp, to capture an active window; or Ctrl+Stamp, to capture the entire screen.
Other programs to capture the screen free
The software I have told you about so far are certainly among the most interesting in the category, but they are not the only ones: in fact, there are many others free screen capture software equally valid, each with different characteristics. Below I list a few.
Mac screen capture software
And up Mac? Again, you can take screenshots using a utility that comes pre-installed in the operating system (called Screenshot) and some third-party programs designed for the purpose. Find it all explained below.
Screenshot

Screenshot is the default application of macOS and dedicated entirely to the acquisition of images (and possibly movies) of the computer. You can open it by double-clicking its icon, accessible from the folder Other of the Launchpad (l'icona a forma di grid which resides on Dock) or from the menu Vai > Utility, residing in the macOS menu bar.
Once opened, the program shows a small toolbar at the bottom of the screen, whose buttons allow you to select a specific capture mode: full screen (l'icona del rectangle), single window (l'icona del selected rectangle) or portion of the screen (l'icona del dotted rectangle).
Once you have made your choice, click on the button options and indicates whether or not to include the pointer mouse, set a timer for screen capture or save the image in one folder specific; the menu in question also allows you to show or hide the floating thumbnail following the acquisition and whether or not to “remember” thelast selection carried out.
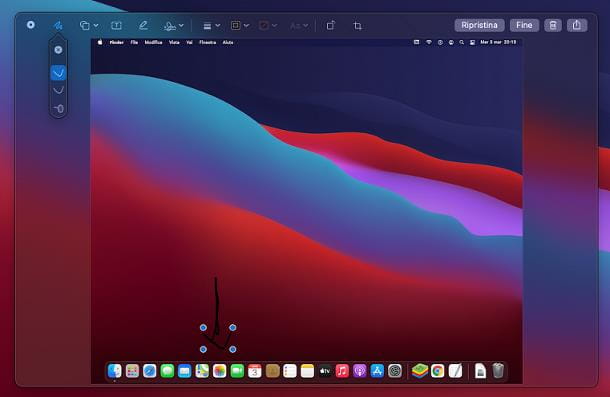
Once all the appropriate adjustments have been applied (if necessary), click on the button Acquire and, if you have chosen to capture a portion of the screen or an active window, trace the area to be captured by pressing and holding the left mouse button (and releasing it to save the photo), or click on the edge of the window to be photographed.
For completeness of information, I point out that you can also take screenshots of the Mac using the keyboard: here are the most commonly used key combinations.
Also, holding down the key control of the keyboard while using the other combinations, you can have the screenshot saved to the clipboard instead of a folder. Read more here.
Monosnap
If the solution seen above does not fully meet your needs, you can give a chance to Monosnap: it is a program available on the Mac App Store, which allows you to acquire images (possibly setting a timer) and modify them using the integrated editor. Basically, Moonsnap is a free application, but you can take advantage of in-app purchases (with prices starting at €4,99) to unlock additional features.
To get Monosnap, connect to the appropriate section of the Mac App Store, wait for the market window to open and click on the button Ottieni / Installa, to start downloading and installing the program (you may be asked to verify your identity using your Apple ID password or Touch ID). Once setup is complete, start the software by pressing the button apri, or through the appropriate icon which, in the meantime, has been added to Launchpad say macOS.
For everything to work at its best, you must initially authorize the application to capture screenshots and make videos of the screen: to do so, click on the button Open Security & Privacy located in the window that appears on the screen, click on the button Open System Preferences (if necessary) and click on the symbol of locked padlock located at the bottom left, to enable the modification of the settings.
Now, enter the mac password in the appropriate field, come on Submit, place a check mark next to the option for Monosnap and press pulsating Exit and reopen, to apply the change and restart the program. Once this is done, close both the System Preferences window and the Monosnap Welcome screen.
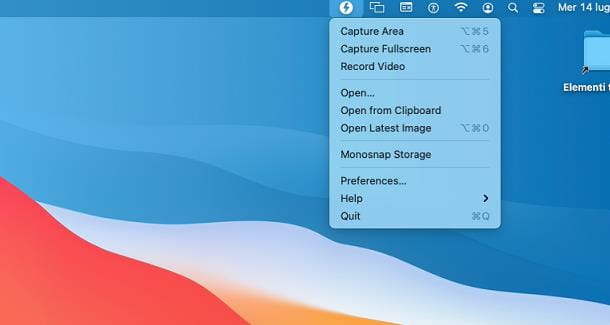
At this point, to take a screenshot, click on the program icon visible on the right side of the Mac menu bar (in the shape of lightning) and choose whether to capture one part of screen (Capture area) or theentire desk (Capture Fullscreen), by clicking on the appropriate item. In the first case, you will have to select the part of the screen to capture by pressing and holding the left mouse button and releasing it when the selection is complete.
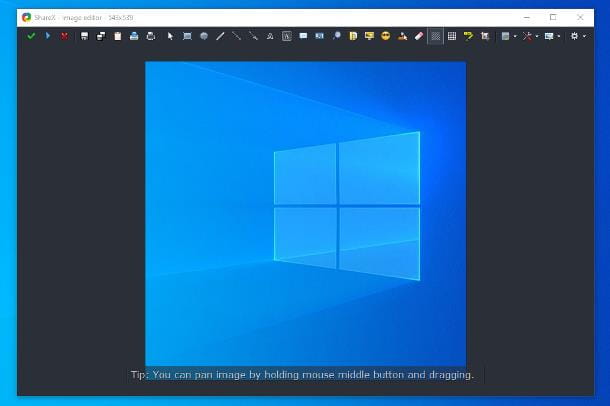
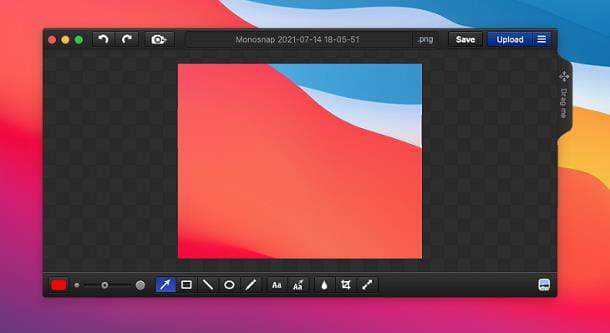
Once the image capture is complete, it will automatically open in Monosnap's built-in editor, through which you can add elements, texts, obscure parts of images and so on.
When you are done, click on the button Save, specifies il name, position and format where to save the image and press the button Save, finally.
Other Mac Screen Capture Programs
In the event that the solutions that I have indicated to you a moment ago have not responded perfectly to your needs, you can evaluate the use of one of the alternative programs that I list below.
- Cleanshot X: it is a practical and functional utility that allows you to create and customize screenshots with ease. The application is paid, but can be obtained for free by subscribing to Setapp, i.e. a service through which it is possible to freely access over 210 paid applications, including Cleanshot X, in exchange for a small monthly / annual fee. For more information, take a look at my guide on how Setapp works.
- Skitch: This is an application developed by Evernote, which allows you to quickly customize your screens by adding arrows, notes, highlights and much more. It's free.
- Greenshot: it's the Mac version of the program I told you about earlier, in the chapter dedicated to Windows. In this case, however, the software is paid and costs €2,29.
- Screenshot FX: it is a software that allows you to capture portions of the screen with customized shapes (even circular) and to modify them quickly. The program supports keyboard shortcuts and costs €5,49.


![How to take screenshots in VLC Media Player [VLC Screenshot]](/images/posts/6eafb8276f333452aded7f0cb49efa41-0.jpg)